Sep 7, 2023
Mileage tracker apps are revolutionizing the way individuals and businesses monitor and categorize their travel. With the increasing need for accurate record-keeping, especially for tax deductions and business expense claims, these apps offer a seamless solution by automatically classifying trips based on user preferences, user patterns, or set parameters. Whether it’s distinguishing between business mileage and personal trips or categorizing routes based on project assignments, the automation feature of such apps not only reduces manual input and potential errors but also provides users with valuable insights into their travel patterns.
Let me walk you through how this feature works in MileageWise so you can take full advantage of it for future drives, ranging from business meetings to Doordash or even Spark deliveries.
A different approach
Unlike other mileage tracker apps that require preparation and groundwork for optimal automatic tracking, MileageWise offers auto-classification from the get-go.
How does it work?
Default Trip Purpose for new, automatically recorded Clients/Locations
At MileageWise, the default assumption is that you essentially want to track business mileage, therefore you simply need to choose a default trip purpose that best defines your regular business-related drives, such as “Business Meeting”, “Delivery”, or “Site Visit”.
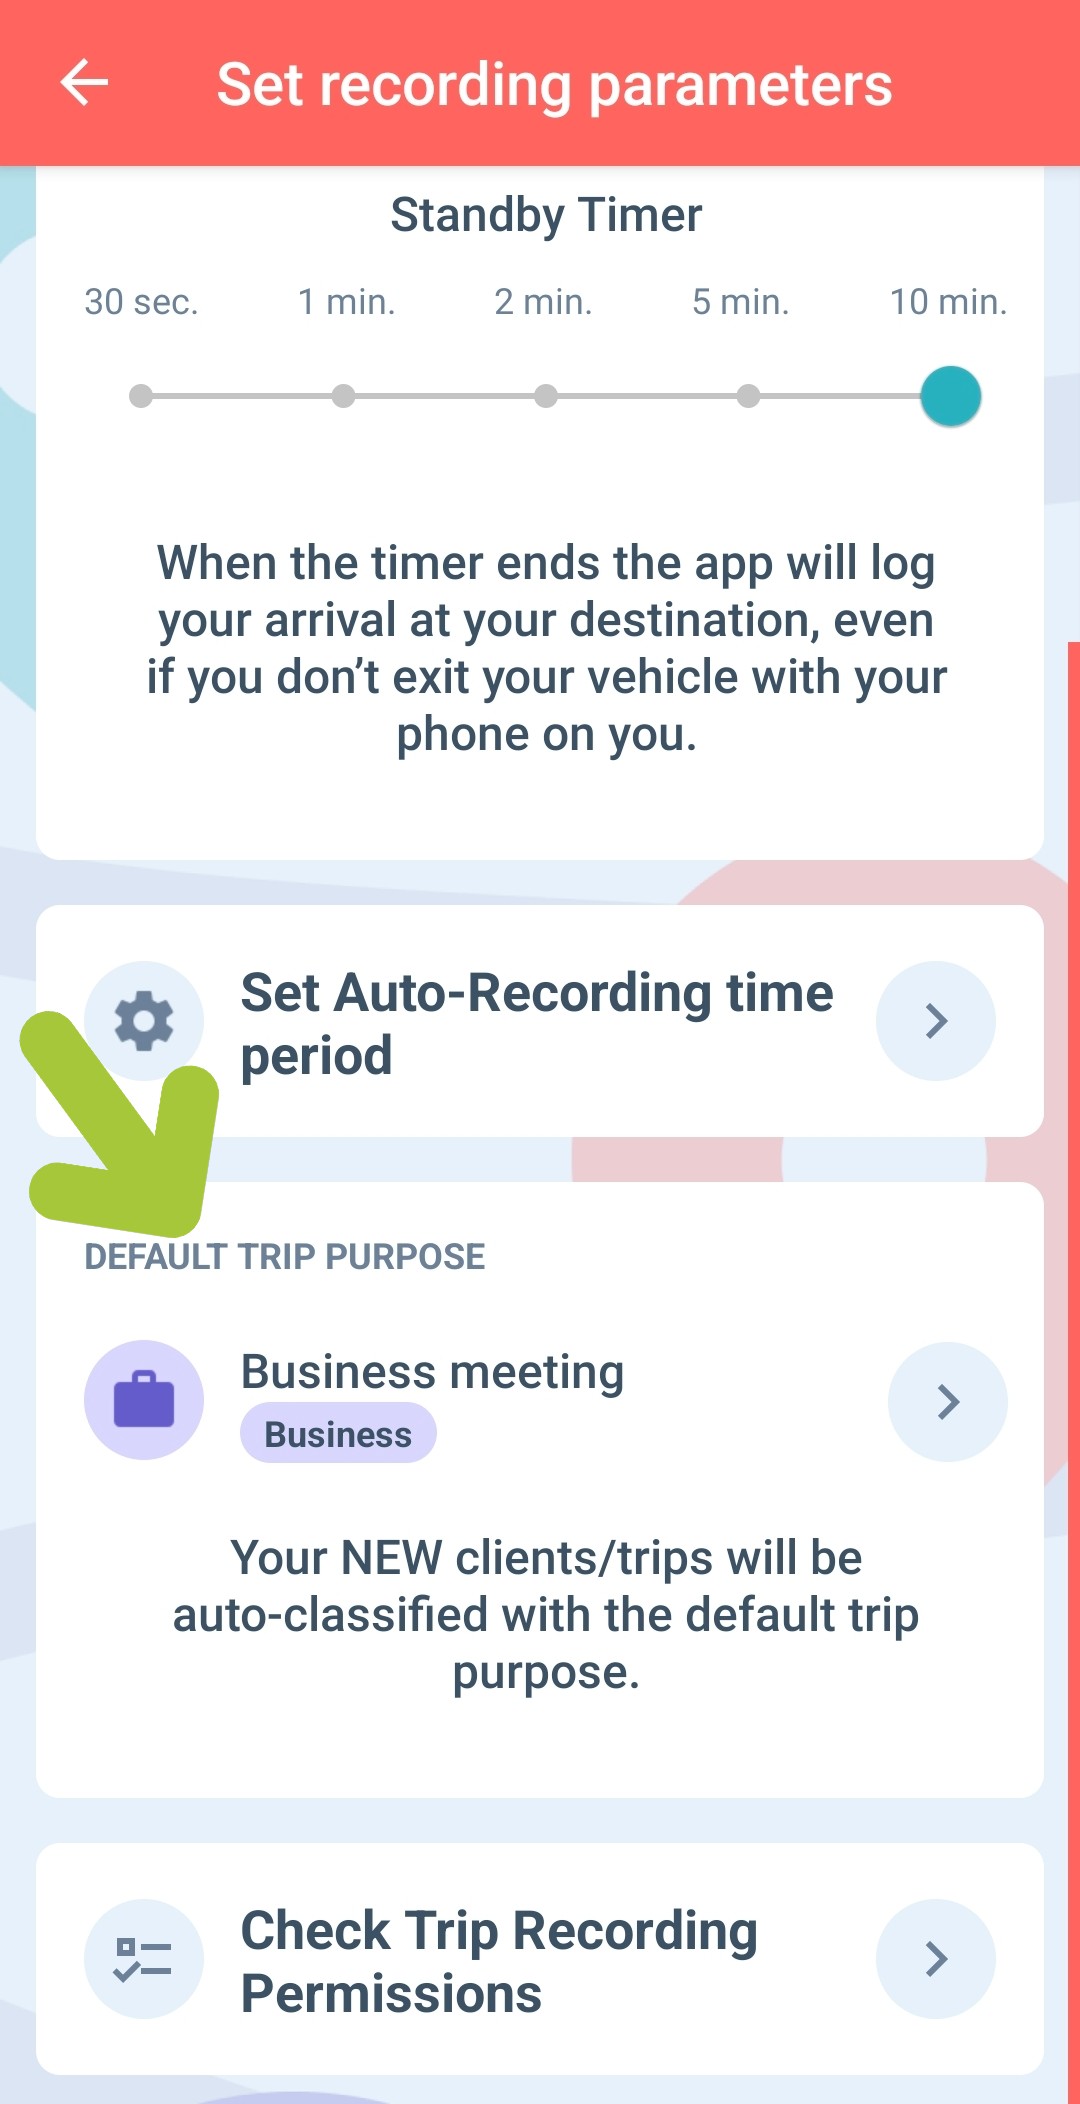
The default trip purpose you set here will be used to auto-classify your new, automatically recorded client/location visits.
Auto-classification for manually added Clients/Locations or modified ones:
If you add a new Client / Location manually, or you would like to change the trip purpose for a saved Client / Location that was auto-classified with your default trip purpose, for one that suits it better, simply visit your Clients / Locations database to make the necessary changes.
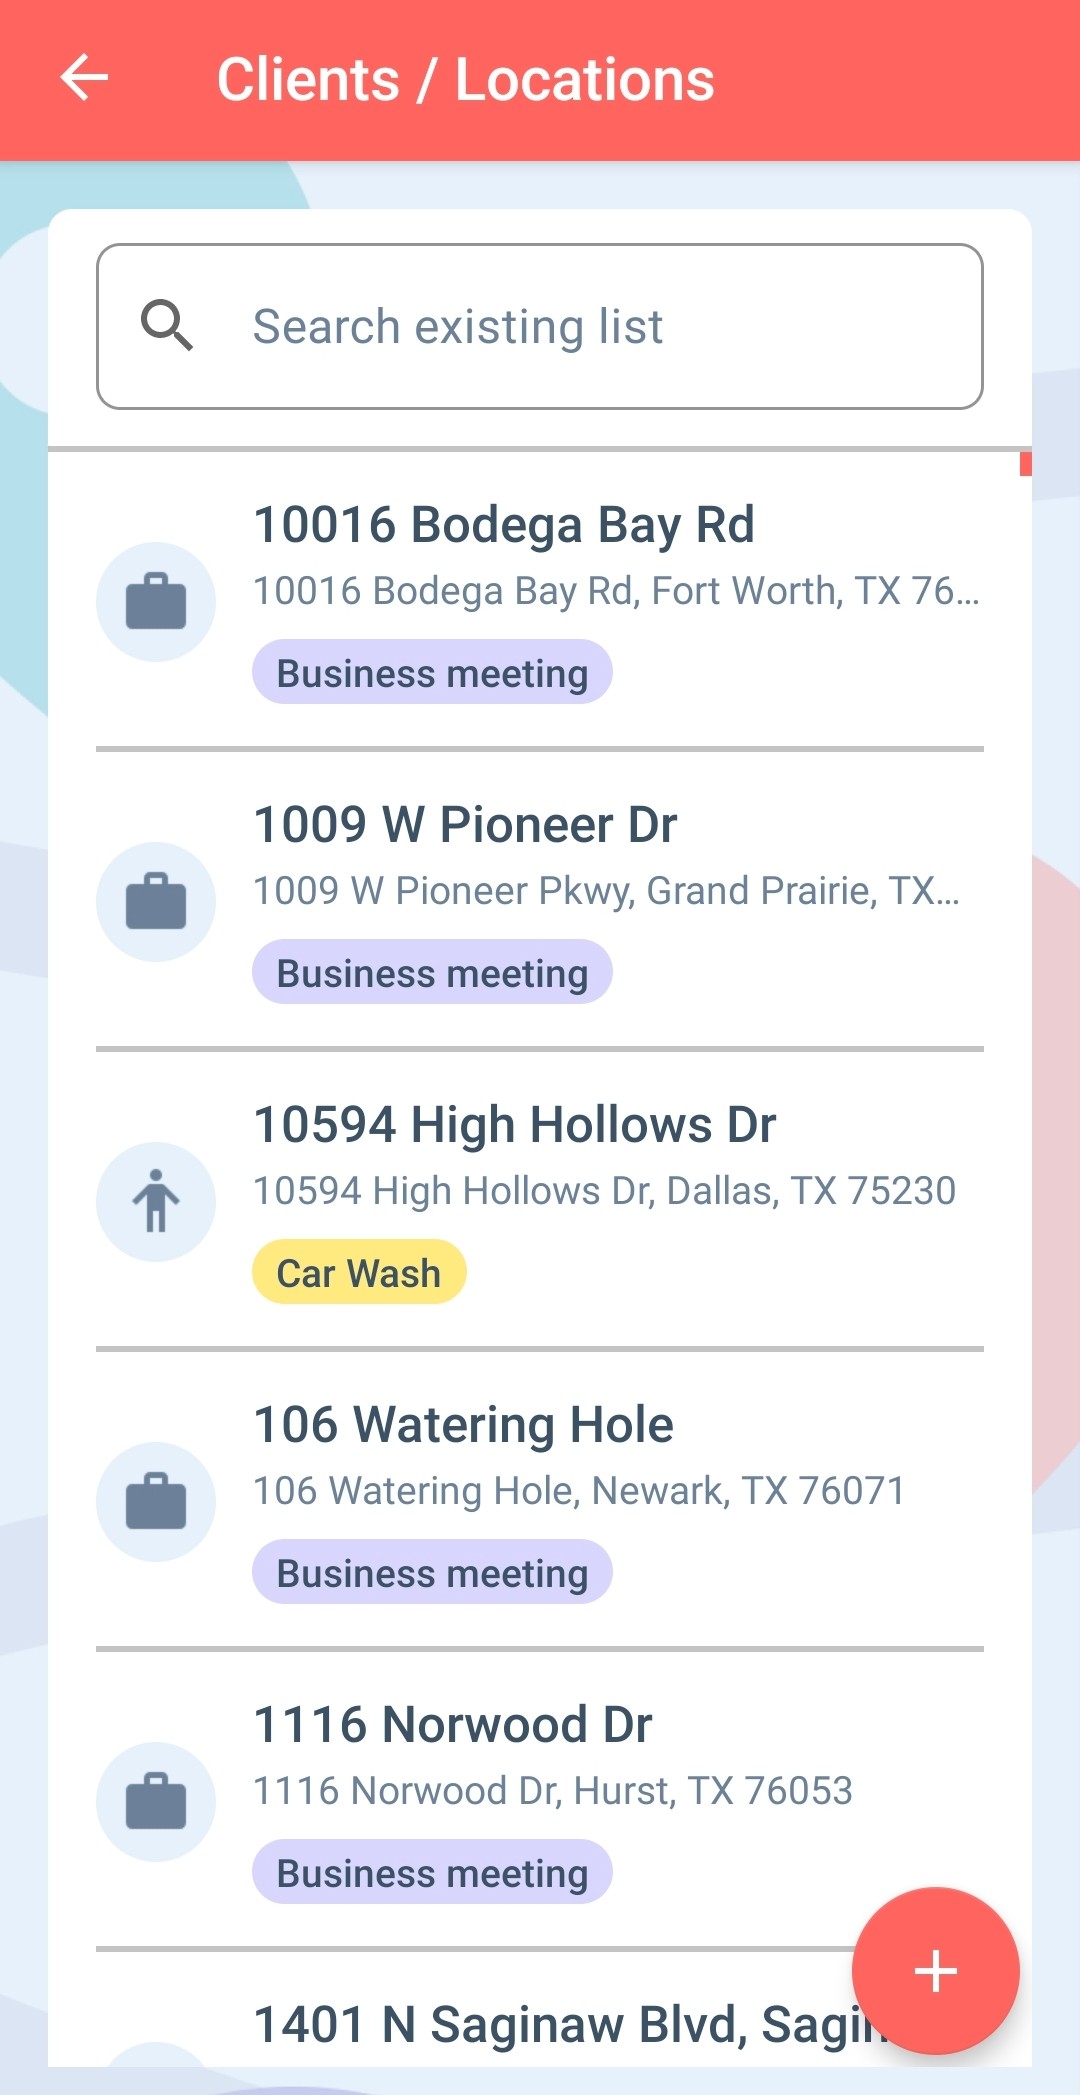
Your second and all subsequent visits to the given Client / Location will be auto-classified with your selected business trip purpose. There is no extra work required, and there’s no need to swipe to classify!
How to set up your default trip purpose in the mobile app
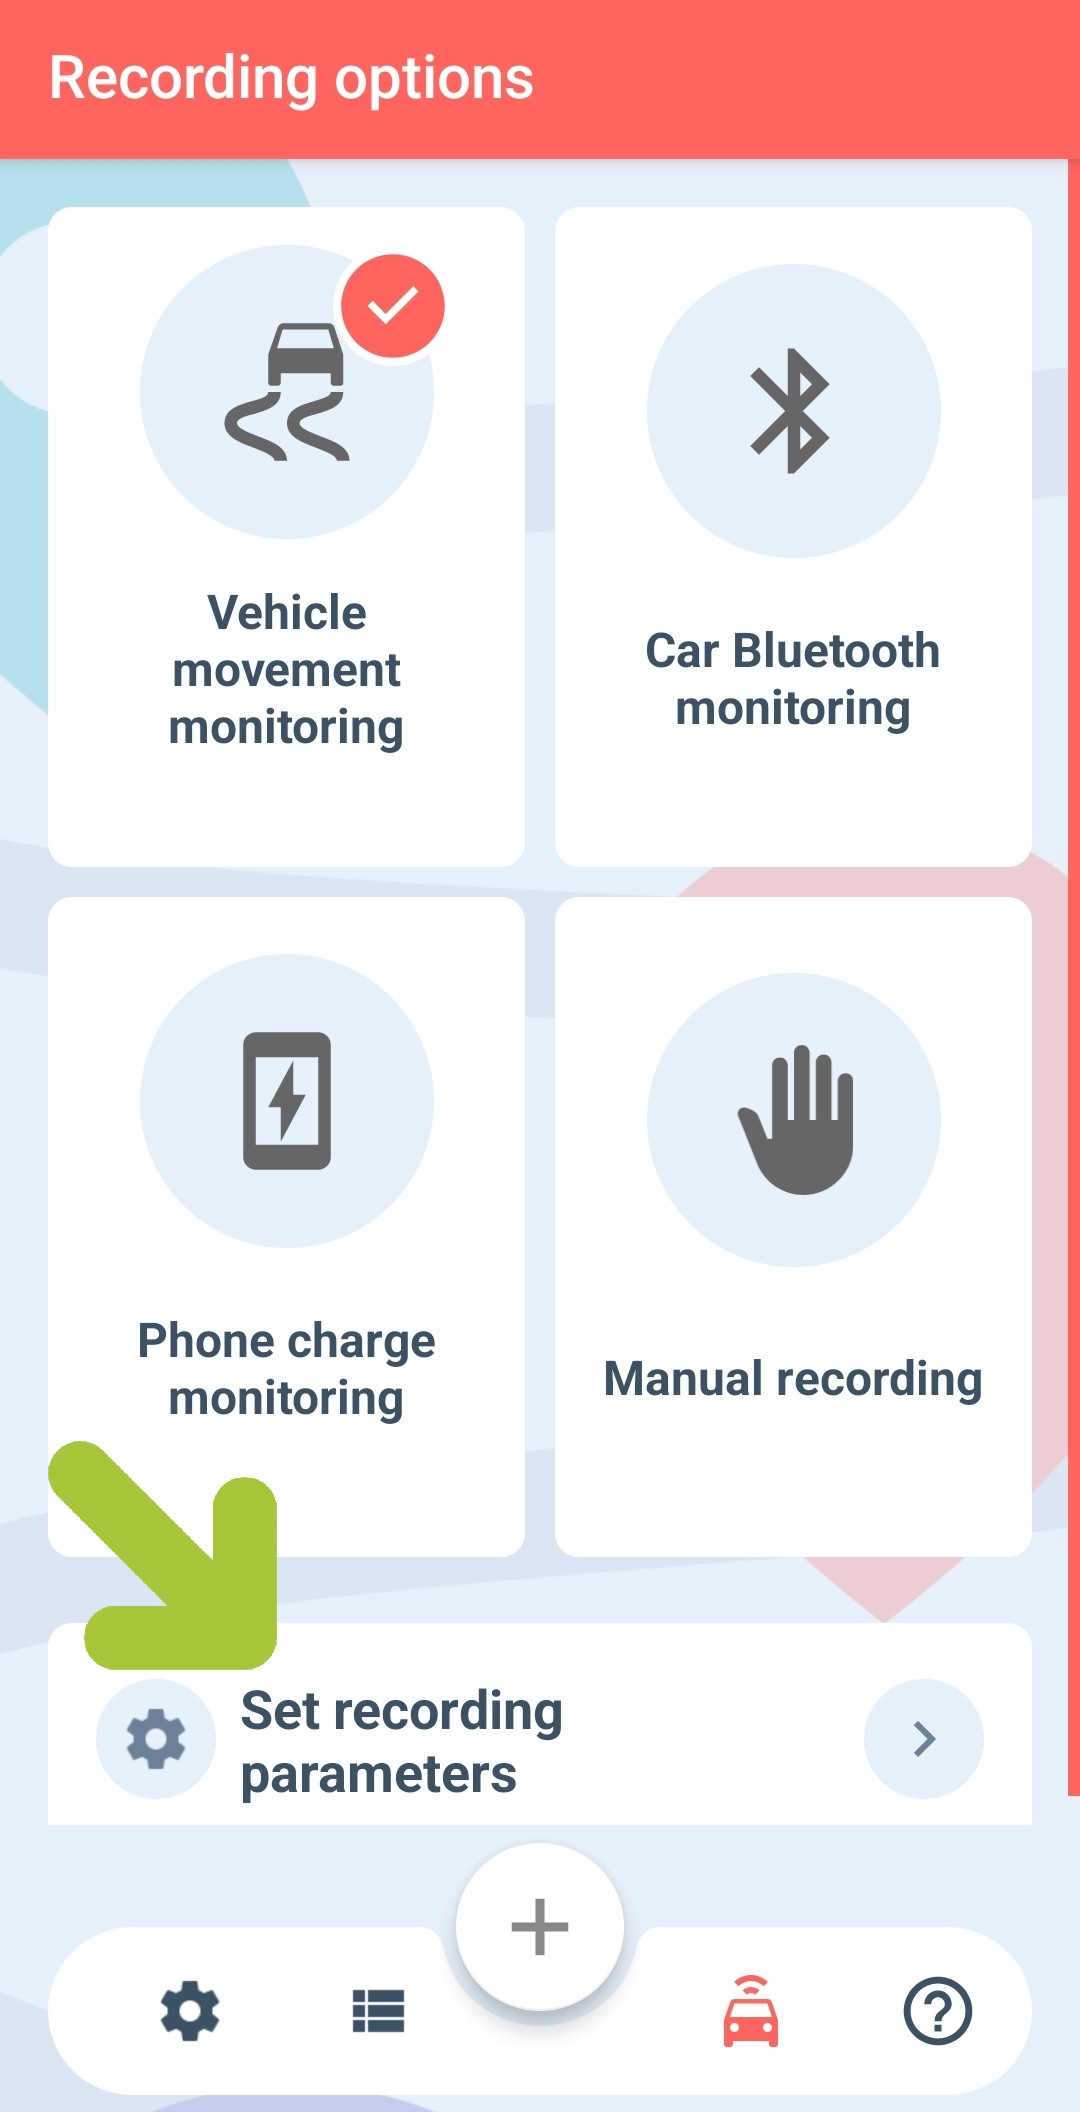
Head to the Set recording parameters tab via the Recording options menu.
In the resulting window, click on the DEFAULT TRIP PURPOSE tile to select one from our existing list, or create your own custom trip purpose and name it as you like.
How to modify auto-classified trips
Web Dashboard:
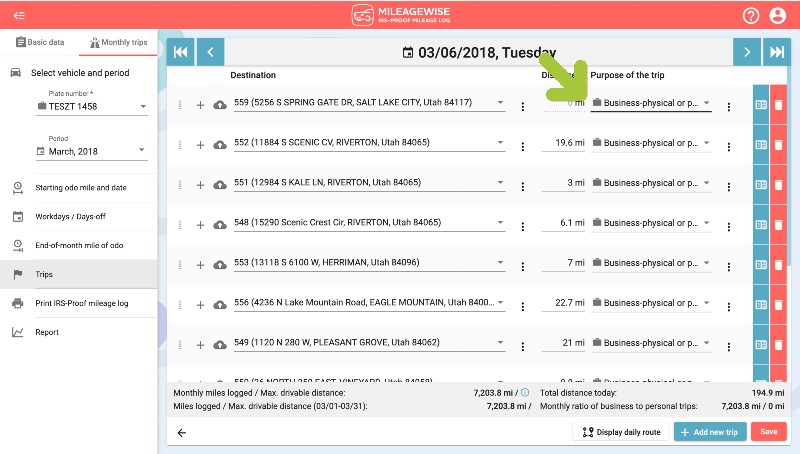
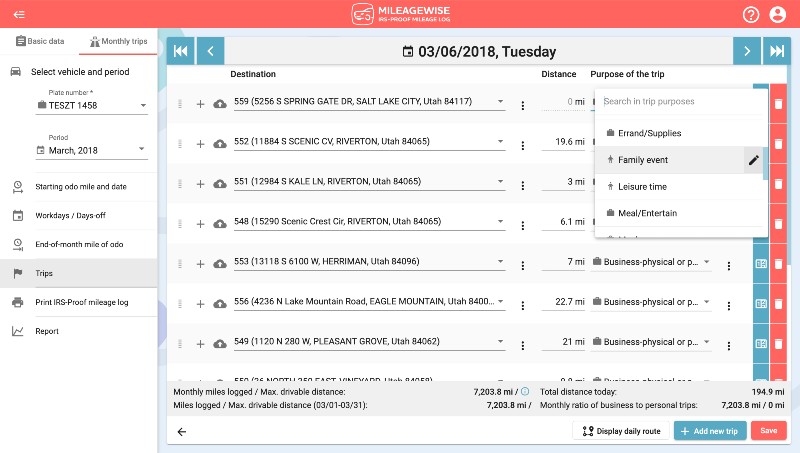
If you need to modify a trip purpose for a given trip, simply click on the day the trip took place and select your desired trip purpose from the drop-down menu (or add your own custom trip purpose).
Remember to click Save! 🙂
NOTE: If you modify the trip purpose here, it will only change the trip purpose for that specific trip. However, if you modify it via your Clients/Locations database, the new trip purpose will be used to auto-classify your future visits to the given Client/Location.
Mobile App:
Visit the Trip screen, click on the trip that you’d like to modify, and select the Modify the trip only option from the menu.
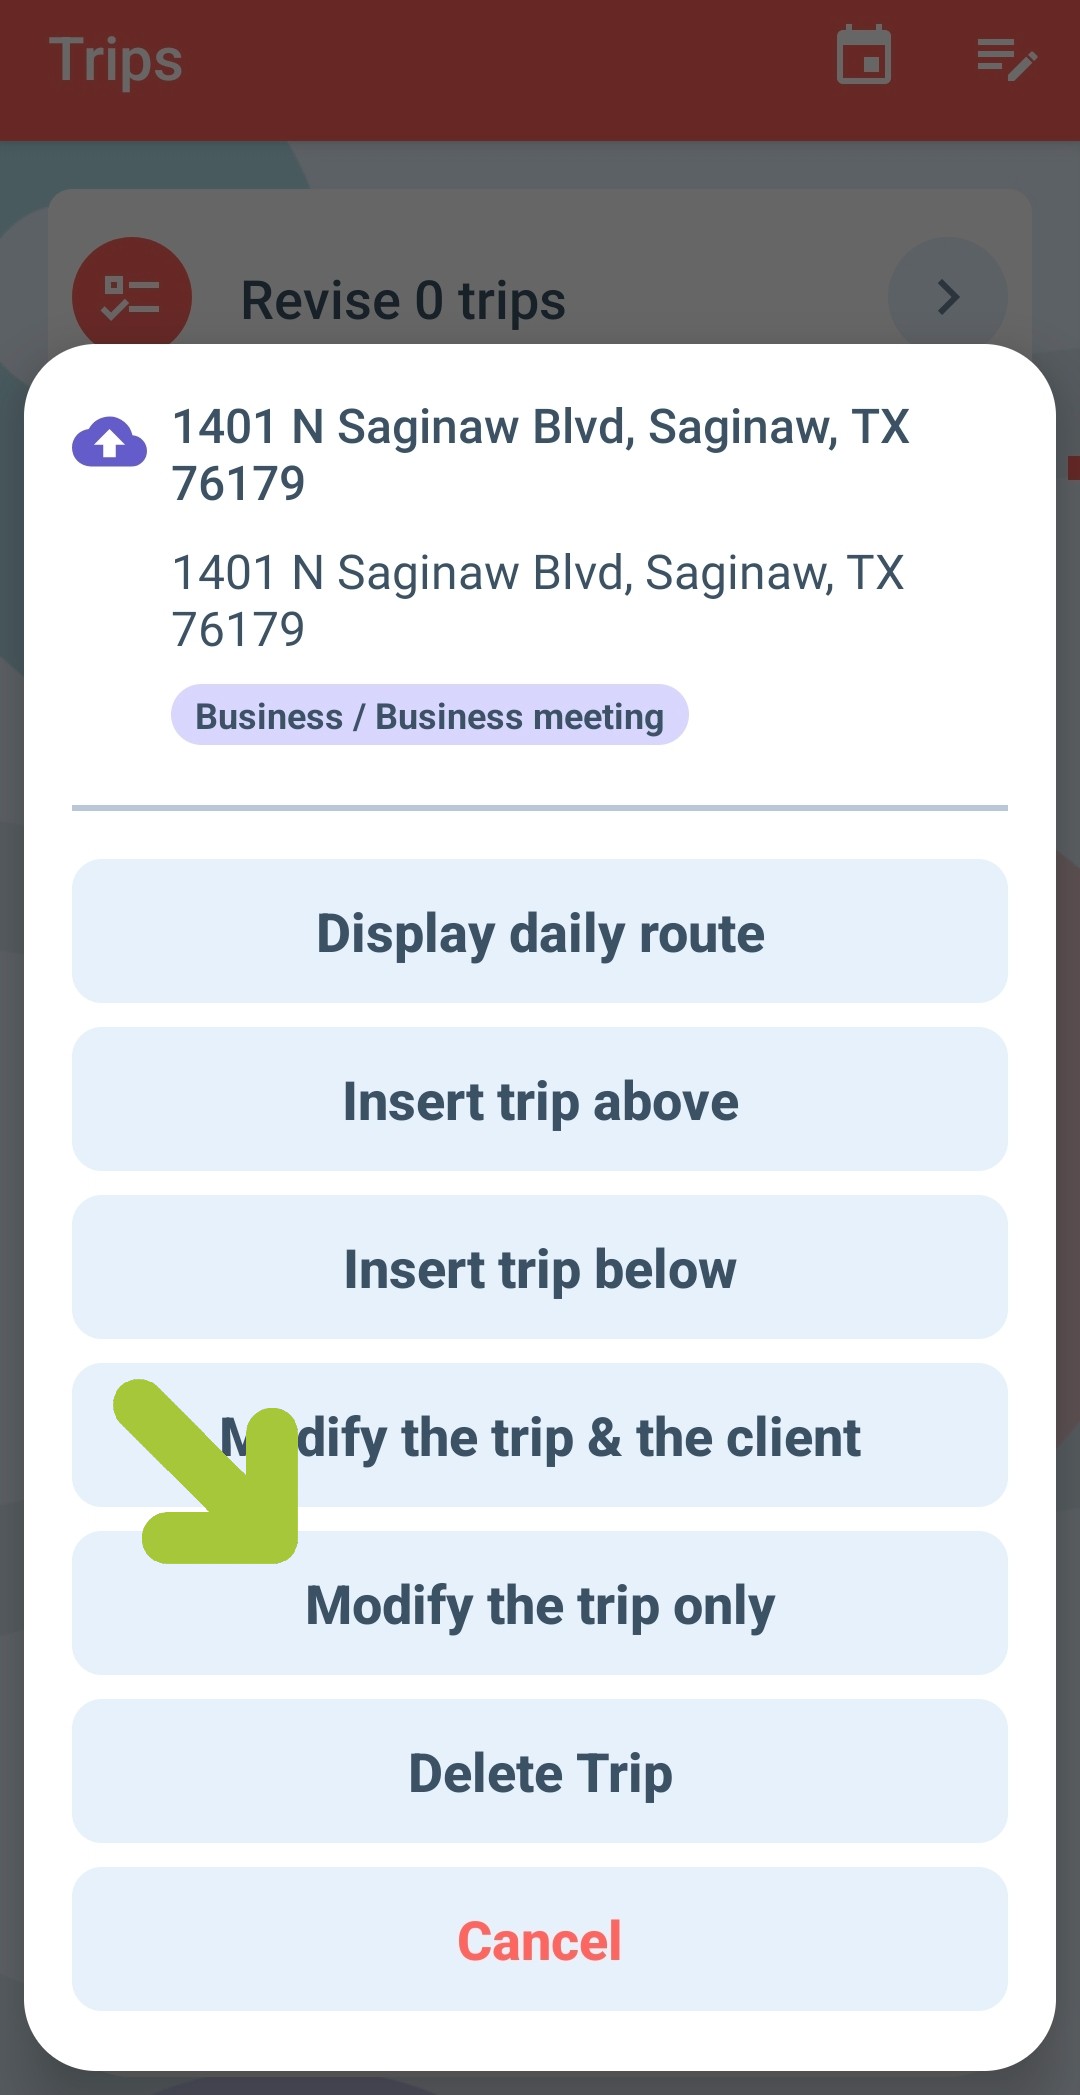
NOTE: If you opt for Modify the trip only, it will only change the trip purpose for that specific trip. However, if you select Modify the trip & the client, it will modify the selected trip, as well as the your Client/Location database, meaning your newly selected trip purpose will be used to auto-classify future visits.
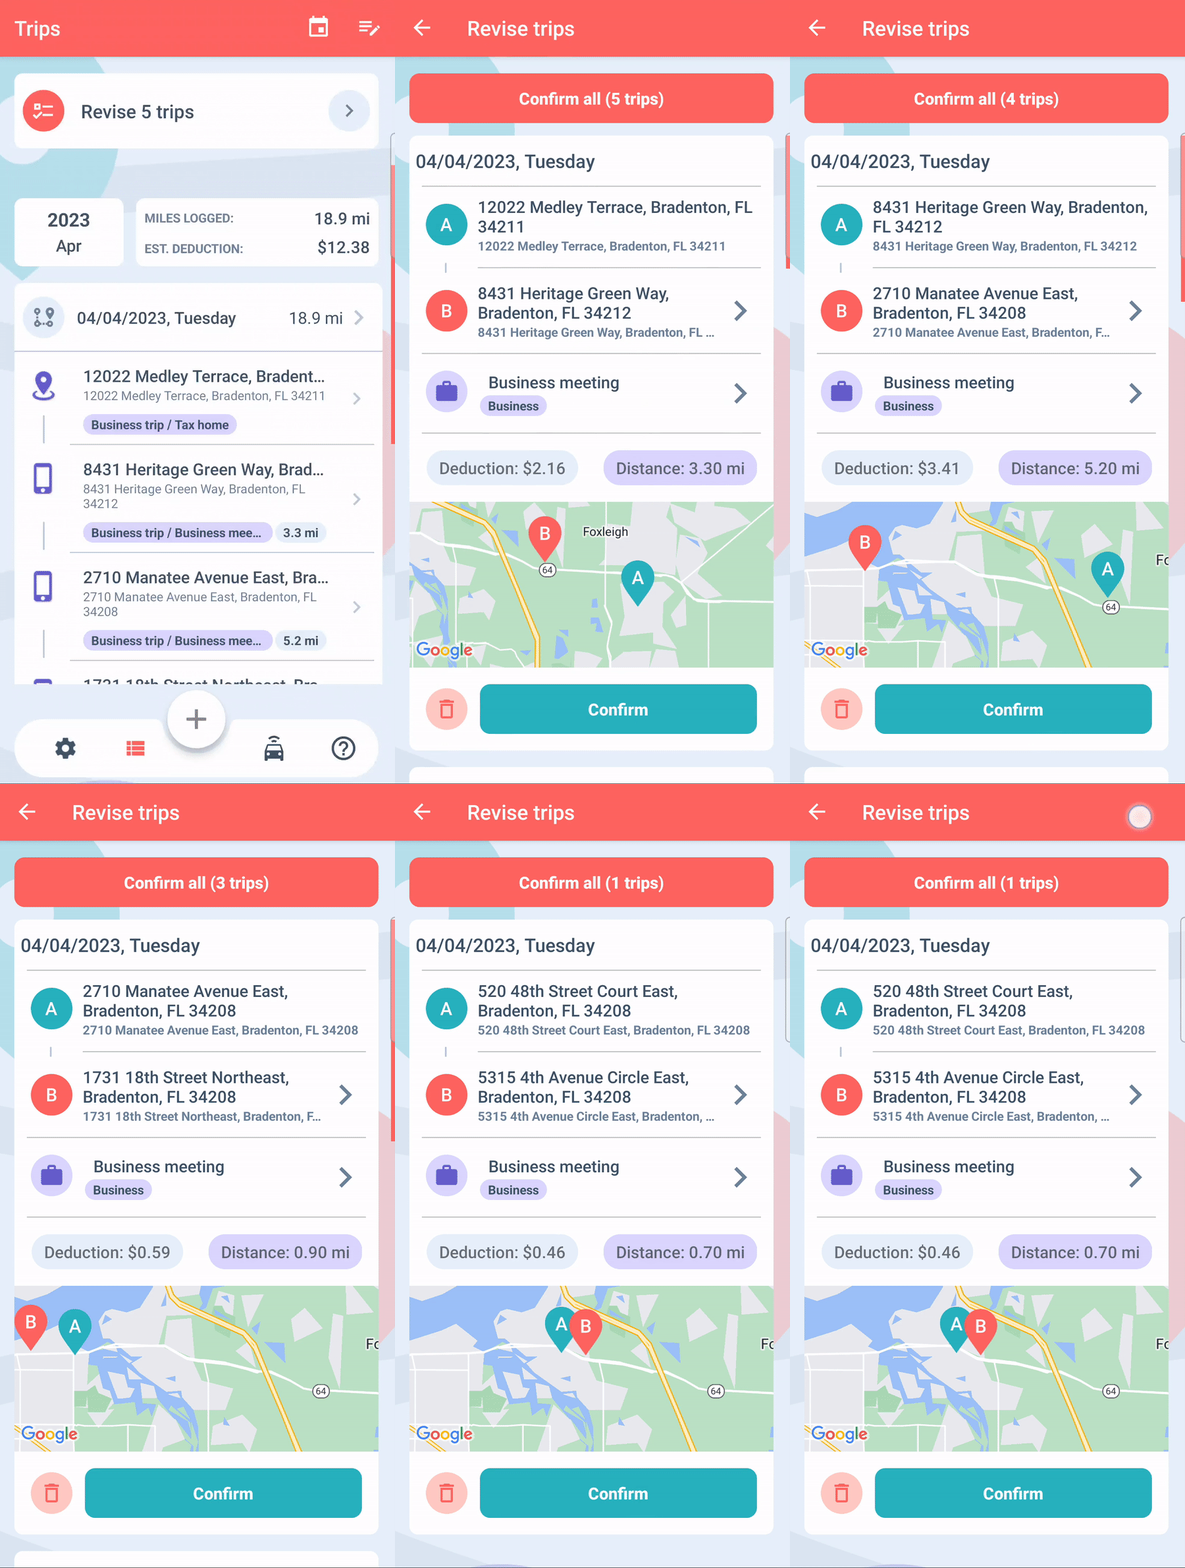
To wrap it up, auto-classification will save you time and facilitate more accurate tracking because you don’t need to set parameters manually for each trip, risking that you would forget to do so. Let me also share a small bonus tip with you: you can also revise trips if you need to. This option allows you to decide if you accept the default purpose for a new Client/Location, want to edit it, or perhaps want to delete a trip, etc.
