Last Updated: April 7, 2025
Google Maps is a useful tool. It helps users explore new places, find directions, and save their favorite spots. However, one of the most helpful features of Google Maps is the saved places and timeline functions.
These features allow users to save and organize their favorite locations, as well as view their travel history. But, in order to access these saved places and timelines on different devices, it is important to know how to export them.
In this article, we will provide a complete guide on how to export Google Maps Saved Places and also how to export Google Timeline from Google Maps.

Try MileageWise for free for 14 days. No credit card required!
Dashboard
Table of Contents
Why you might need to export Google Maps saved places and Google Timeline data
Storing & sharing your travel history
Although Google Maps Saved Places and Google Timeline features are incredibly helpful, it can be frustrating if you are unable to access them on different devices. For example, if you want to share your travel history with friends or family members, you will need to export your Google Maps Saved Places and Google Maps Timeline.
In addition, you might need to export your data to create personalized travel maps that highlight all the places you’ve visited over the years. These maps can be used for personal reflection or as unique visual content for travel blogs and social media posts. By customizing your map with notes, photos, and special markers, you can create even more engaging stories of your adventures to share with friends and family.
Advanced Data Analysis
After exporting your data, you can not only review and visualize your trips but also create personalized reports through advanced data manipulation. Using tools like Google Sheets or Excel, you can sort, filter, and visualize your travel data to uncover hidden patterns and insights. For instance, Google Sheets allows you to create custom dashboards that can display your travel frequencies, and common routes, and even calculate travel times between locations.
Even though the correct use of these sheets requires competence, these visualizations can be incredibly useful for personal record-keeping, professional reporting, or simply gaining a better understanding of your travel habits.
Using your Timeline for Tax Reimbursement
One additional reason for exporting your Maps data is to track your mileage for tax or reimbursement purposes. If you use your personal vehicle for business purposes, exporting your Google Timeline data can help you accurately record your mileage and claim the appropriate deductions on your taxes or seek reimbursement from your employer.
You can export your Timeline data and import it into a mileage software such as MileageWise to create your IRS-proof mileage log. This can be especially helpful for people who travel frequently for work.
With MileageWise, you can easily import your Google Timeline data and use it to track your expenses and deductions.
In the next section of this article, we will provide a step-by-step guide on how to export your Google Maps Saved Places and Google Timeline from the Maps App.
NOTICE
NEW GOOGLE MAPS TIMELINE INTEGRATION - IMPORT FROM MOBILES
Google has changed the storage of the Timeline Location History. It migrated from the cloud to mobile devices. Thus, most users are left without access to their Timelines on desktop platforms. MileageWise steps in with an exclusive solution!
Export your Timeline from your phone. MileageWise will transform it into Precise, IRS-Proof mileage logs!
How to Export Your Google Maps Saved Places
Exporting saved places is a great way to use your data to create personalized maps and import them into other map applications. Here’s how to do it:
- Step 1: Head to Google Takeout, which is a tool that allows you to download a copy of your data from various Google services, including Saved Places.
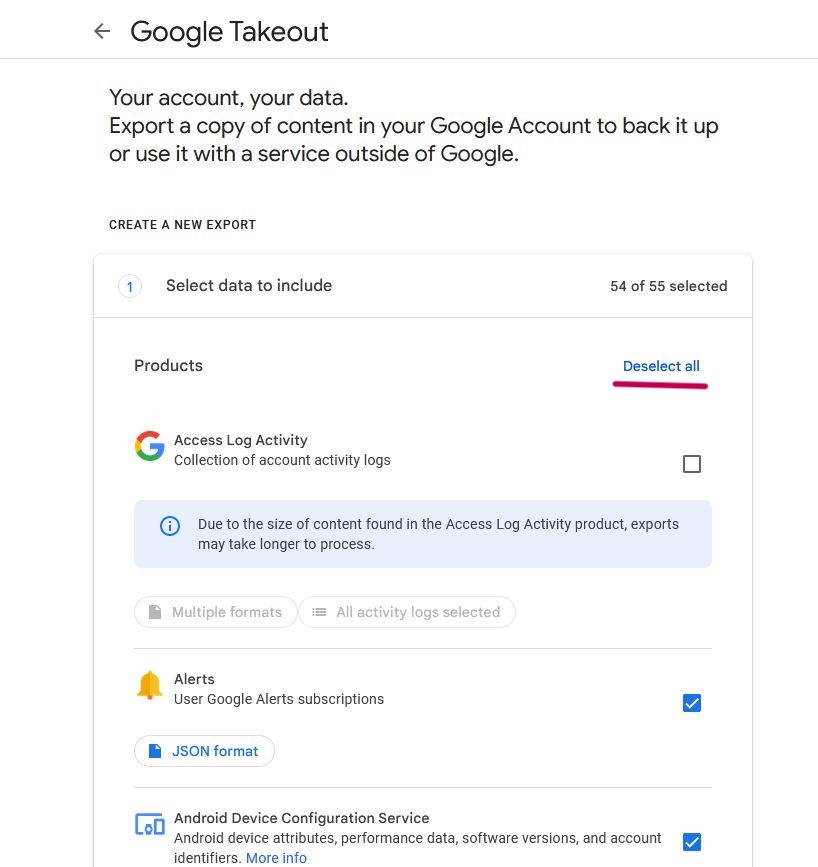
- Step 2: All data will be selected by default. You will have to first deselect all from the list:
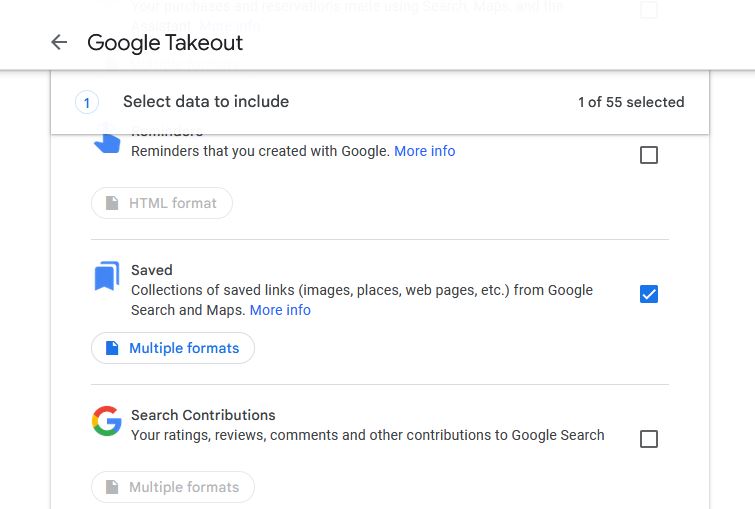
- Step 3: Select “Saved”:
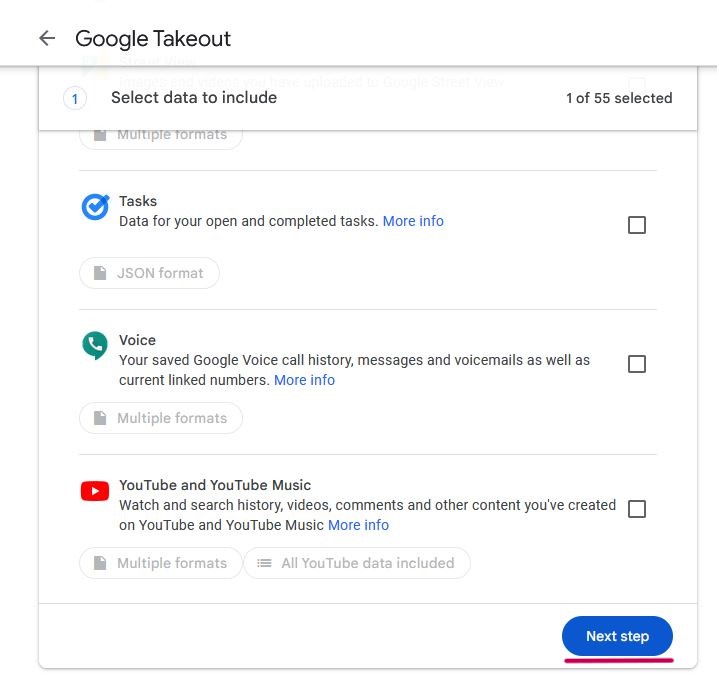
- Step 4: Scroll down and click “Next Step”:
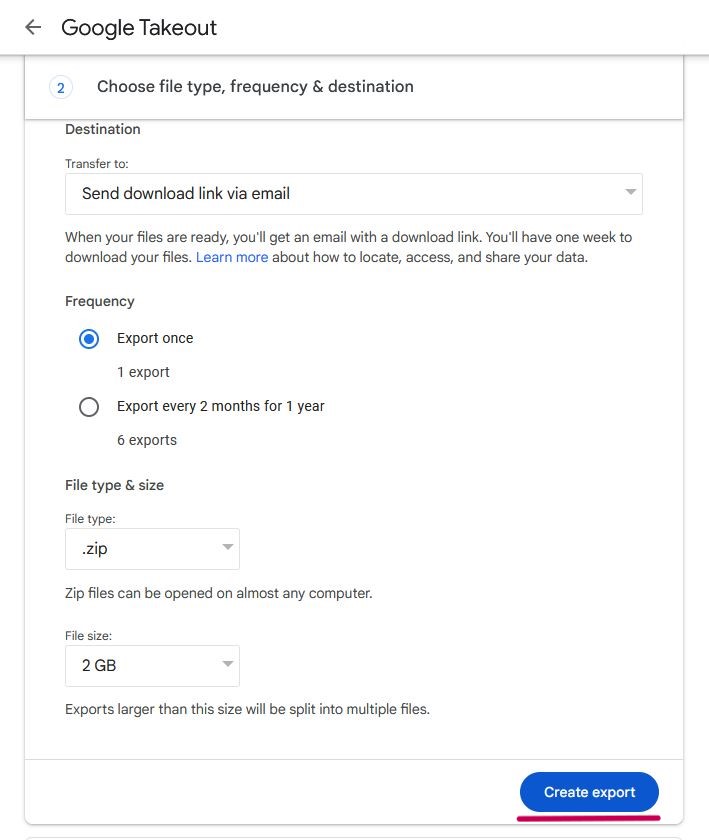
- Step 5: Select your destination, export frequency, file type and size, then click “Create export”:
- Step 6: Wait for the export to finish. Google will notify you once it is done.
How to Export your Google Maps Timeline
Google Timeline is a powerful tool that allows you to track your location history and view your activity on Google Maps. It’s a great way to keep a record of where you’ve been and when you were there. However, if you want to view it and edit it on a desktop, you will need to know how to export it.
Check out our detailed guides for iOS and Android Timeline export.
iPhone Timeline to IRS-proof Mileage Log
Android Timeline to IRS-proof Mileage Log
Here’s the complete walkthrough of the import process, step by step:
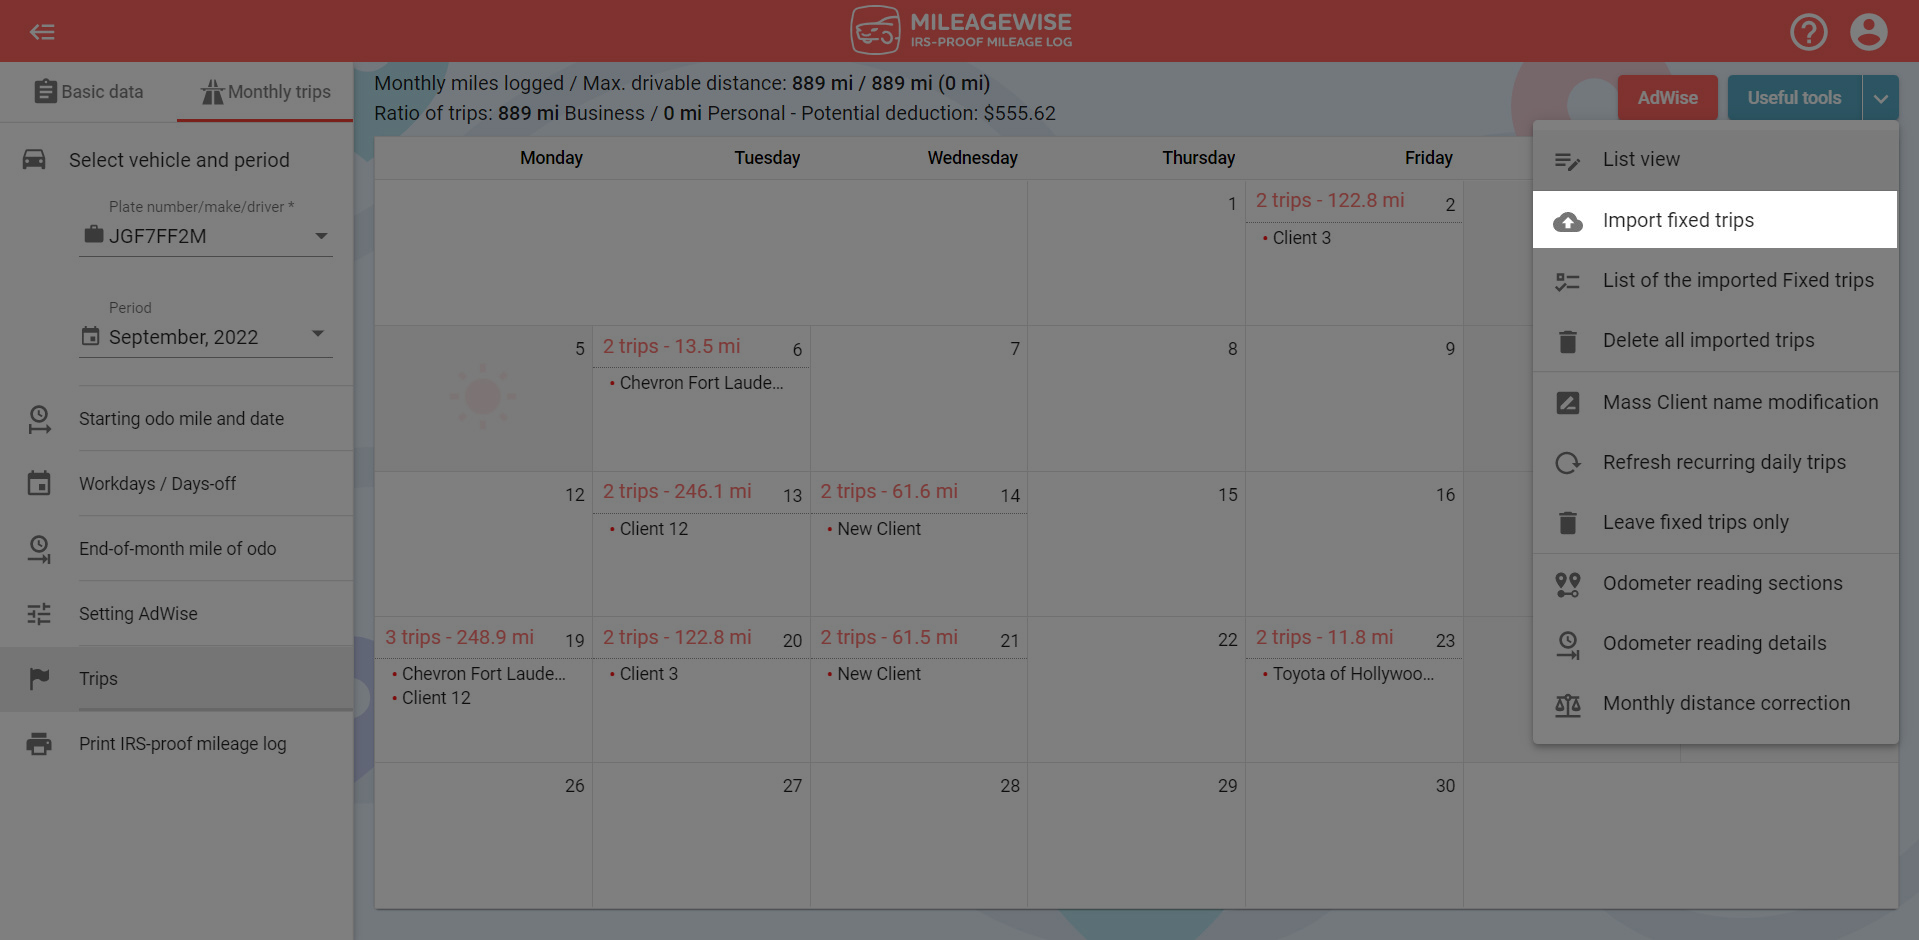
To import your fixed trips, go to the Trips tab under the Monthly trips menu, open Useful tools in the top right corner, and select Import fixed trips.
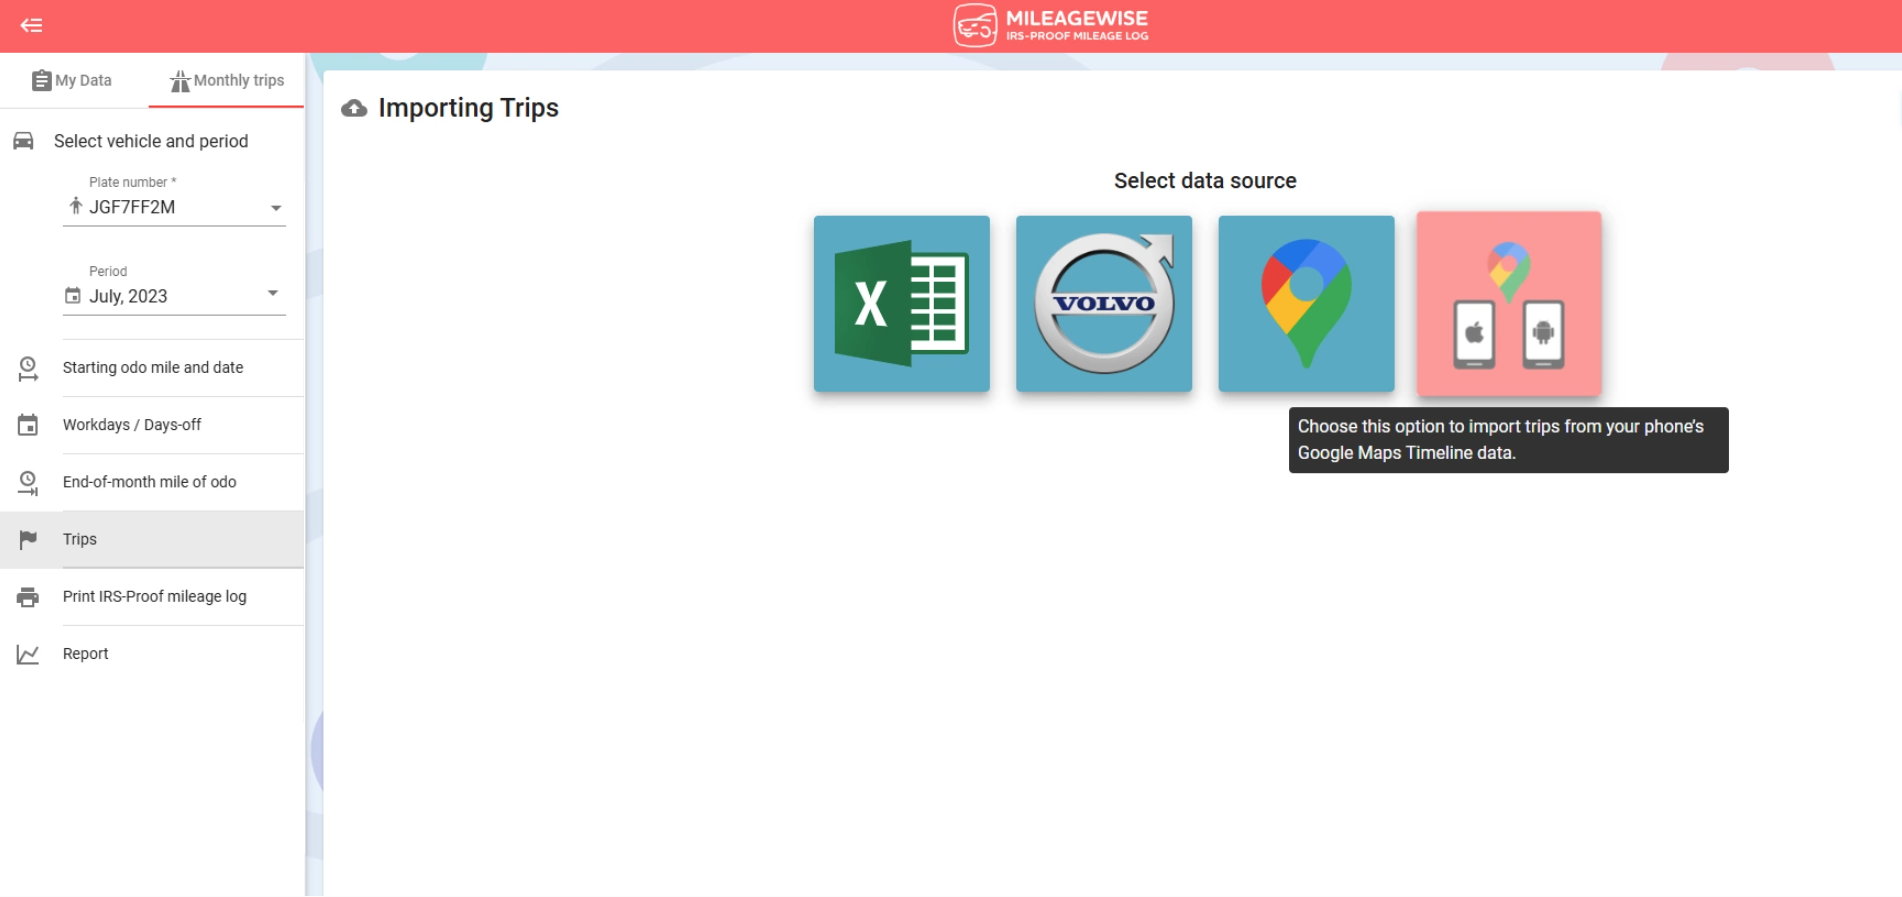
Select Mobile Google Timeline from the available data sources, then click on Next step.
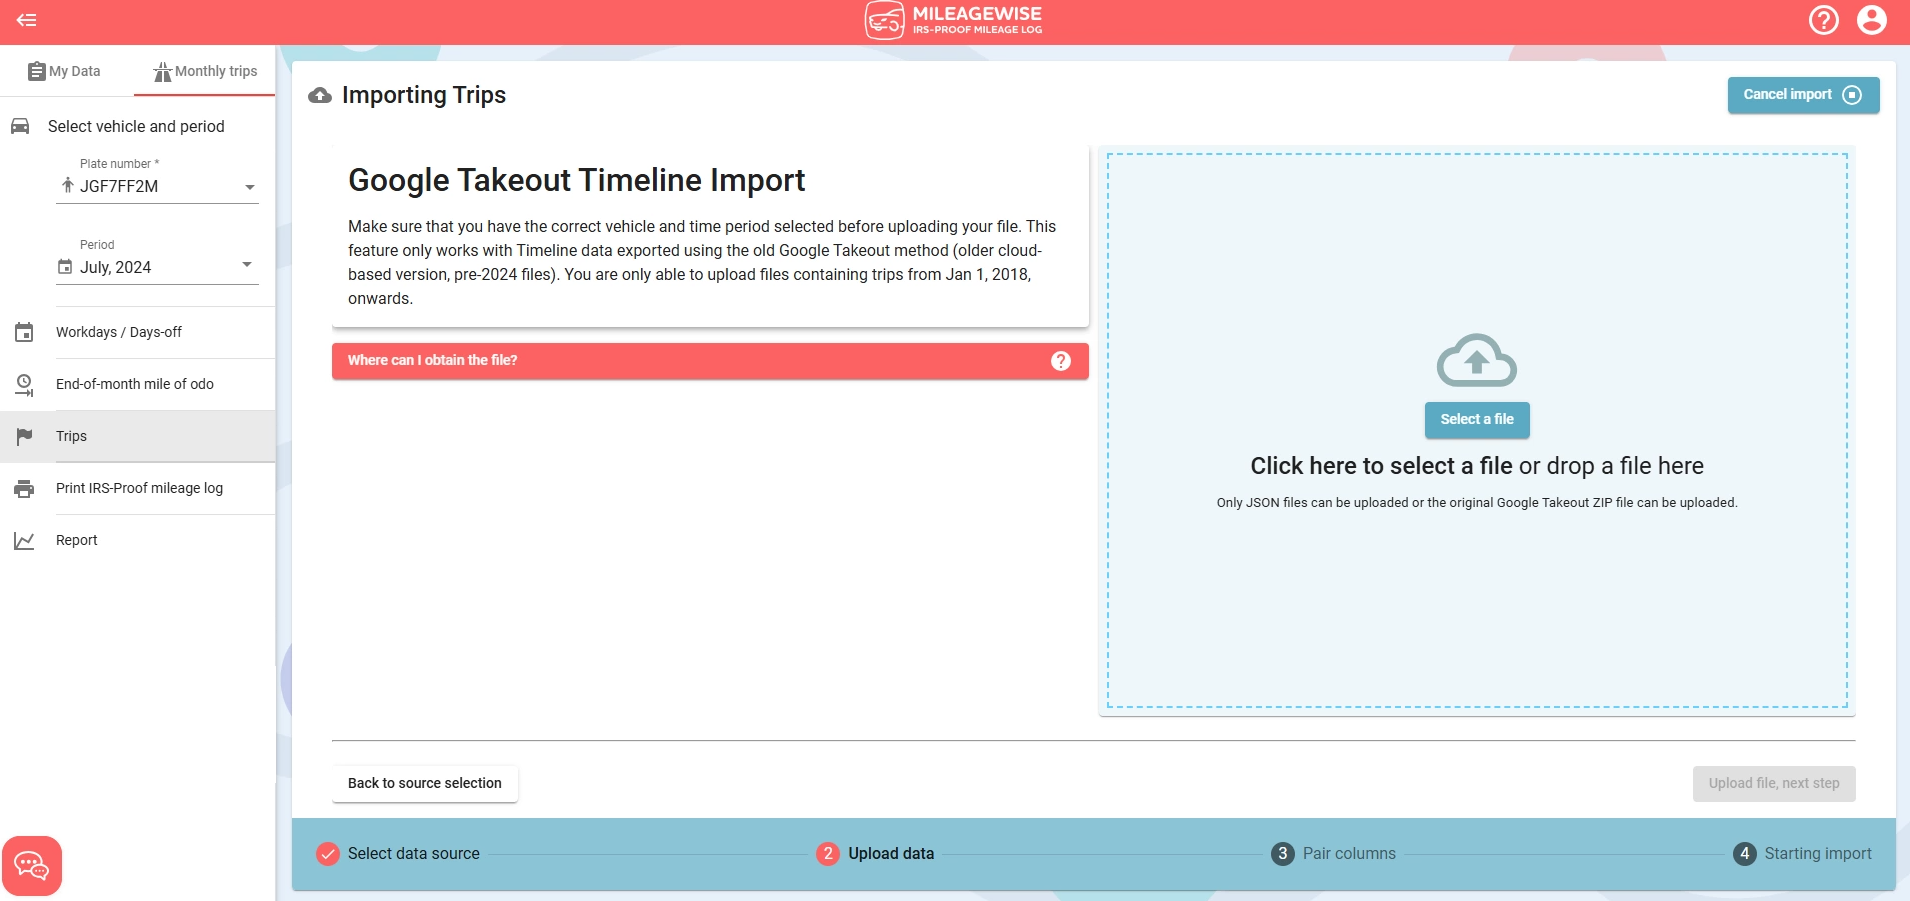
Select your file on your computer to upload your JSON file.
Once the file has been recognized click on Upload file, next step.
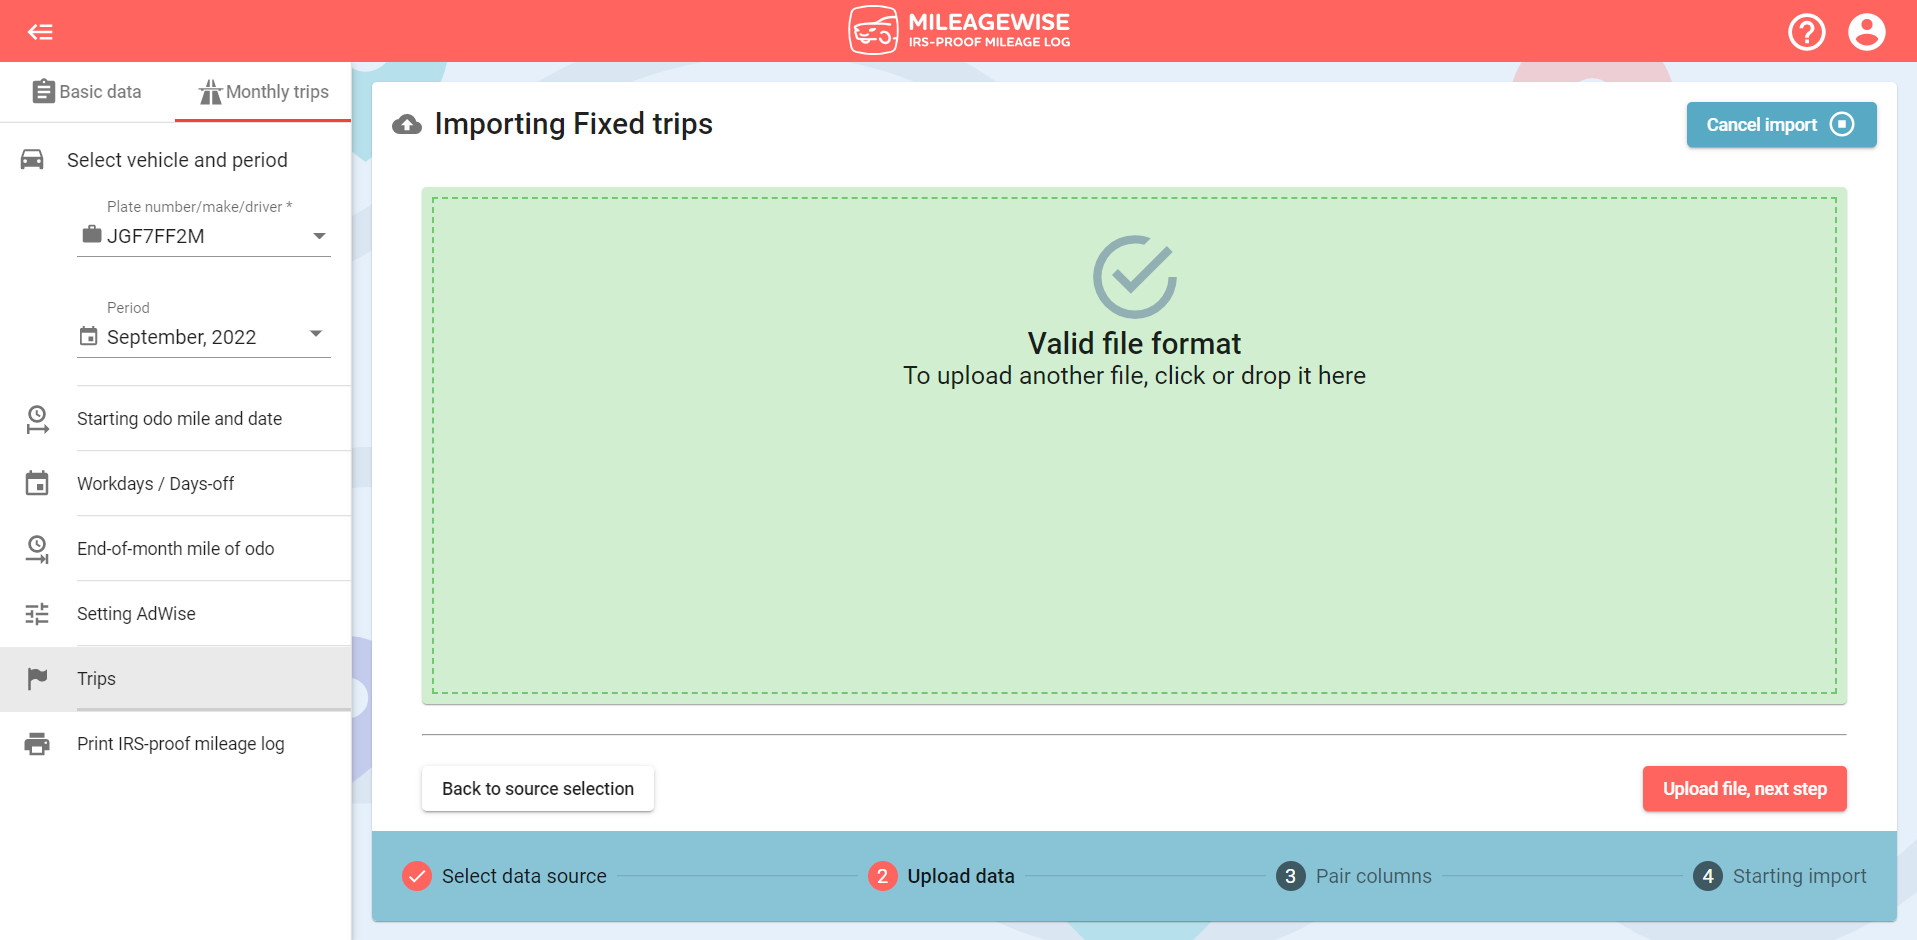
The program will pair the columns automatically.
The import process may take 10-15 minutes, you will be notified via email. You can review the trips of other months in the meantime.
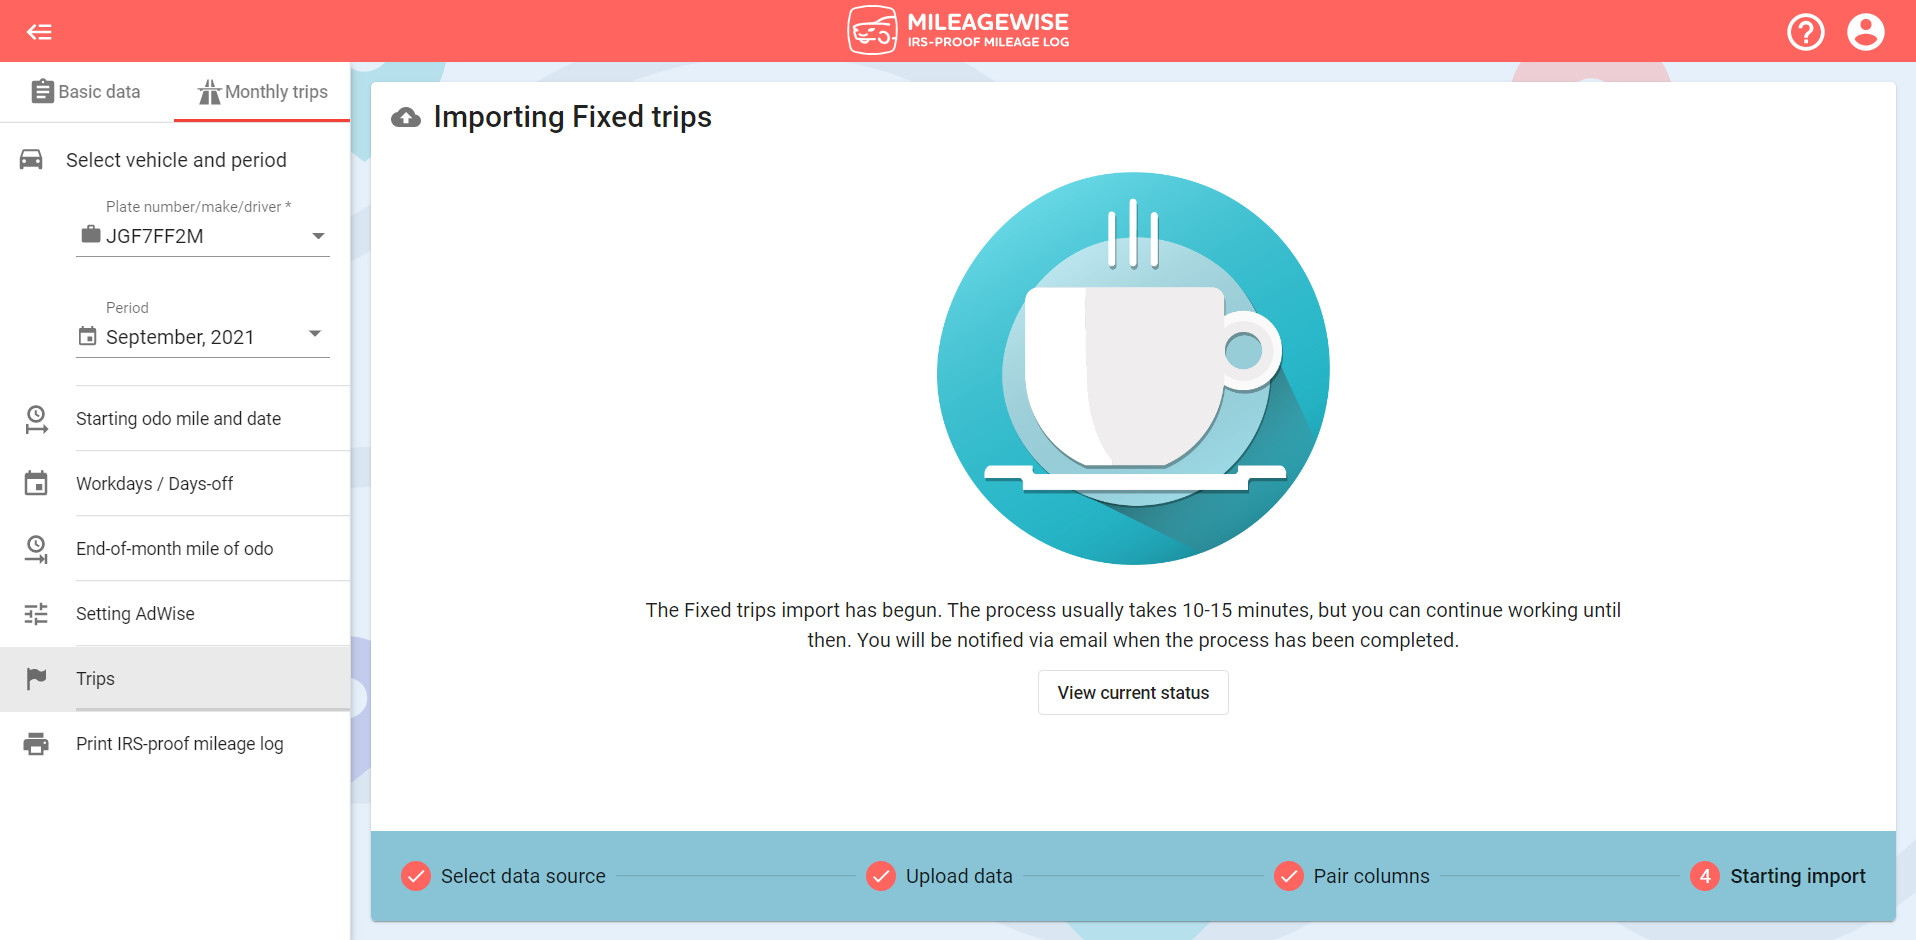
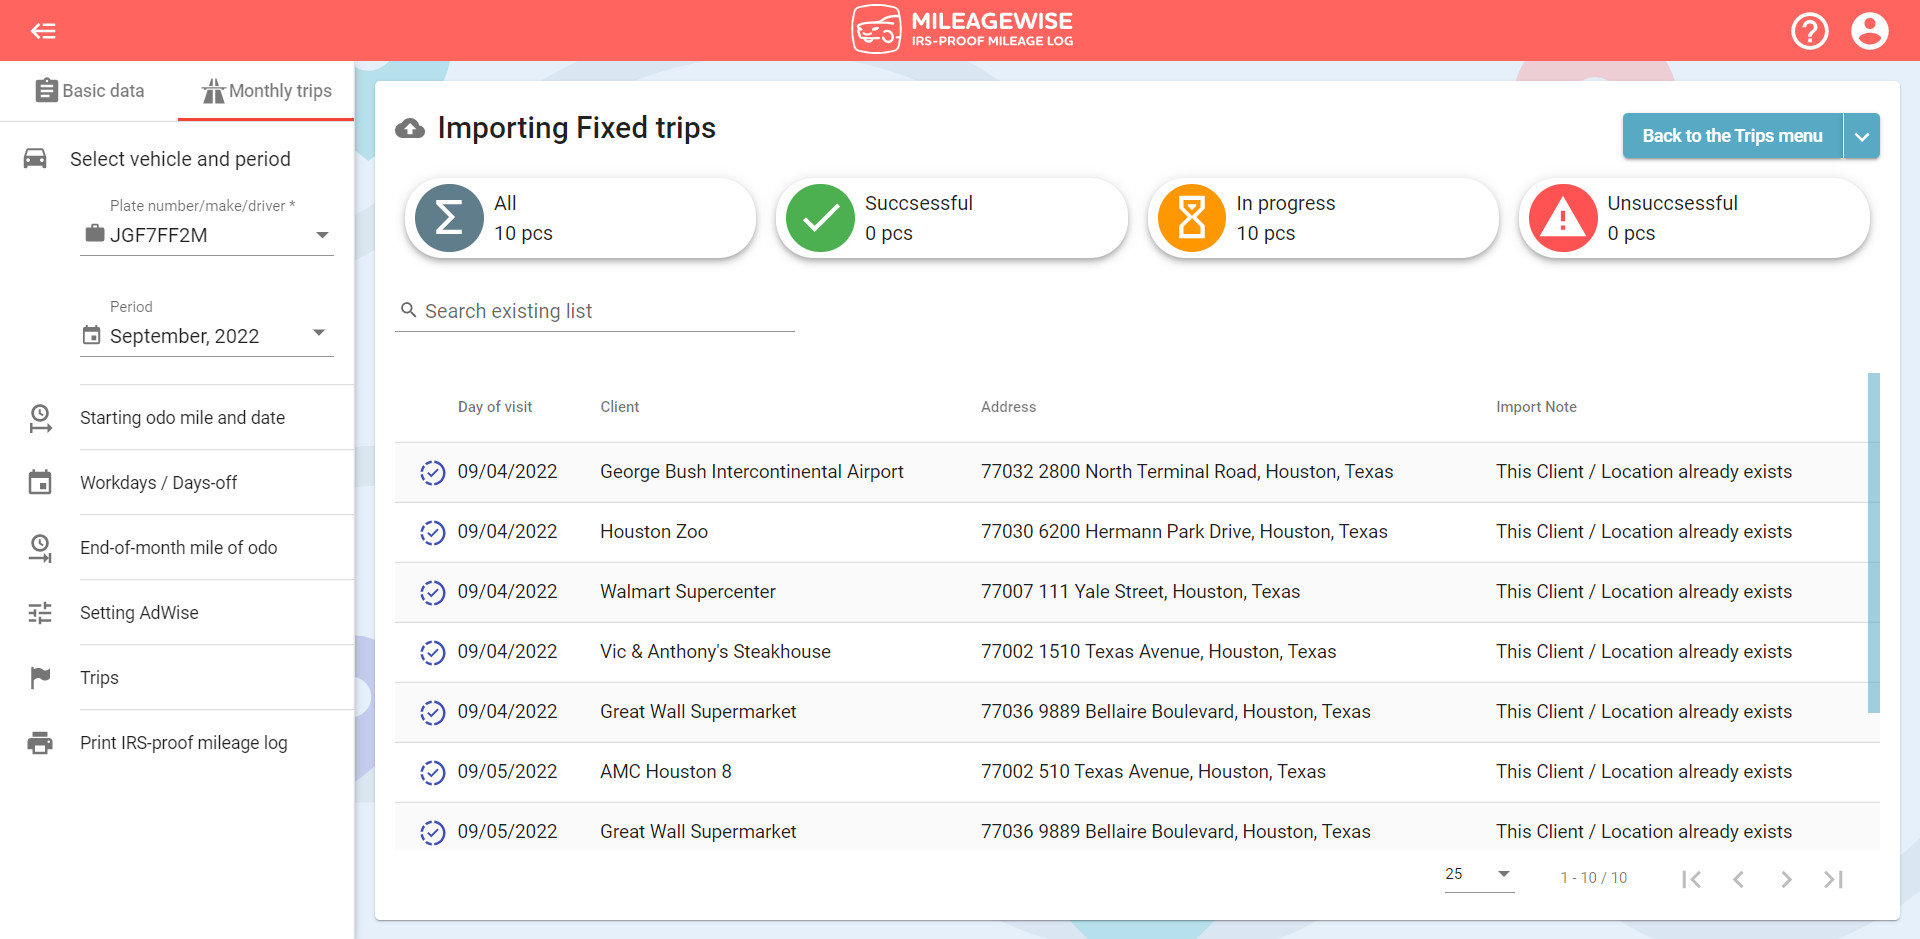
Clicking on the View current status button, a list of the fixed trips will be displayed, and in the upper fields, we will indicate where the process is: how many trips have been imported successfully, how many are in progress, and how many trips could not be imported.
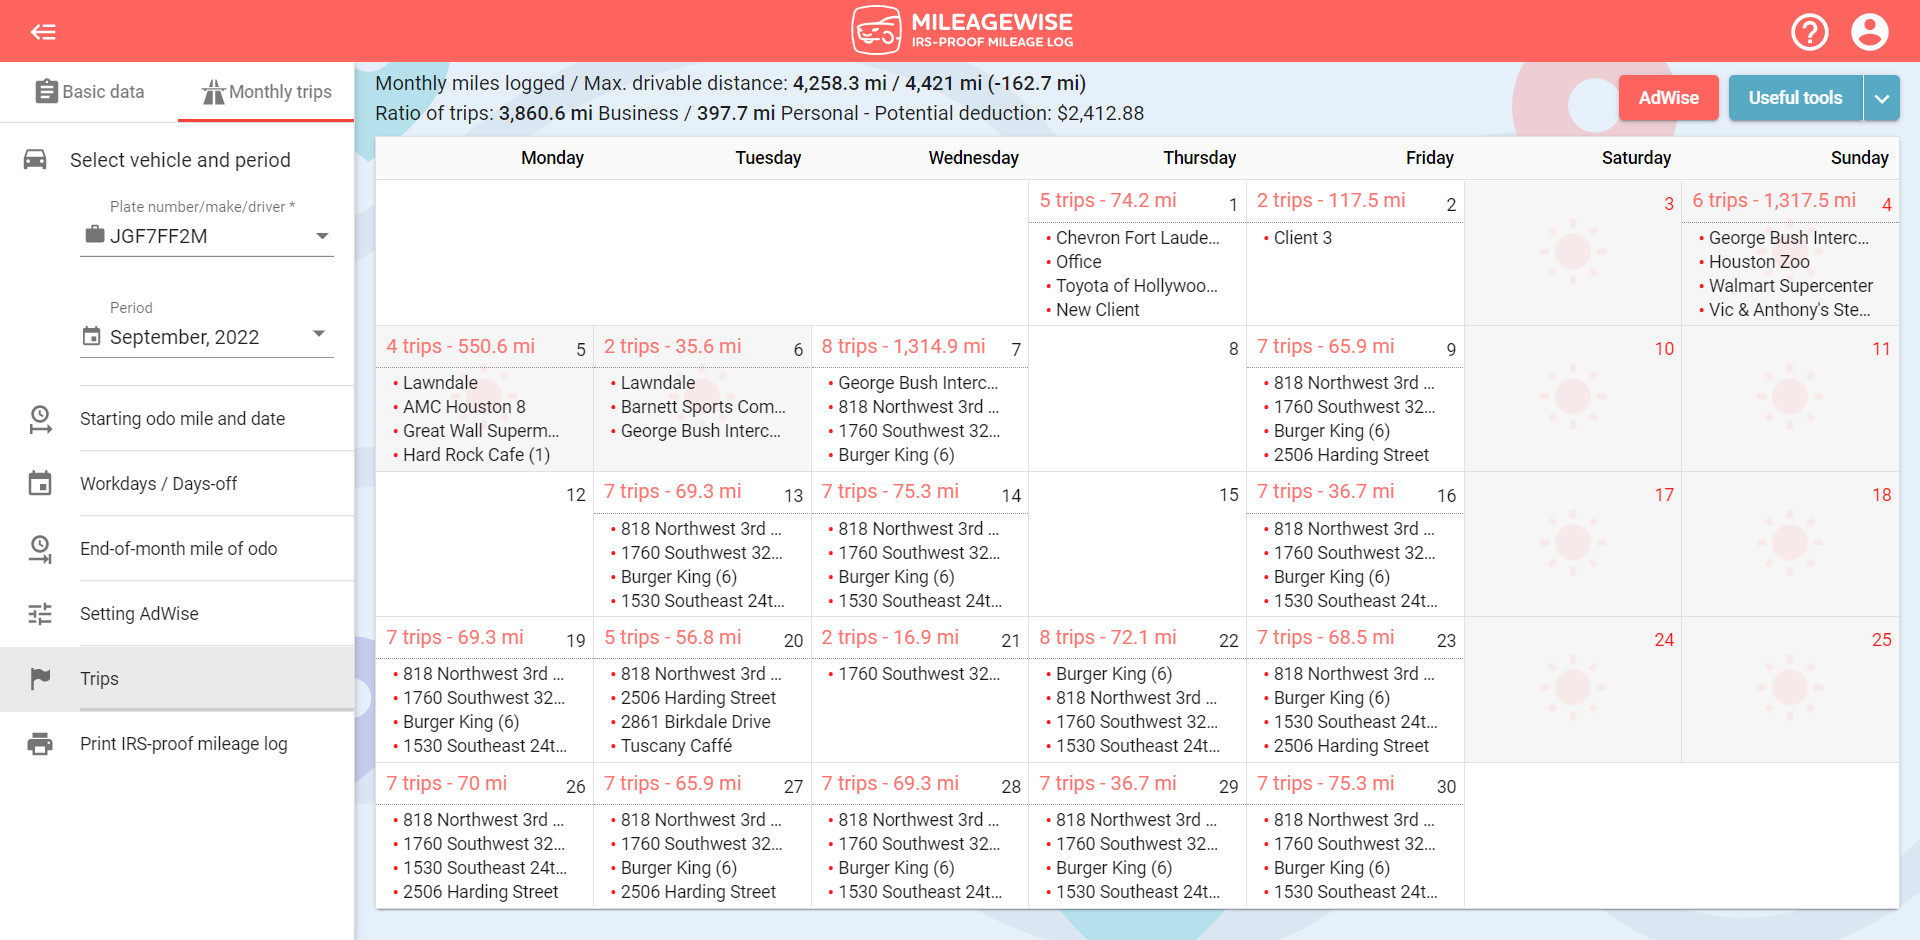
When the import process has finished, go back to the Trips tab via the Monthly trips menu to view your trips.
If you have already recorded a refueling / charging on a given day, then the imported trips will be inserted after the refueling / charging:
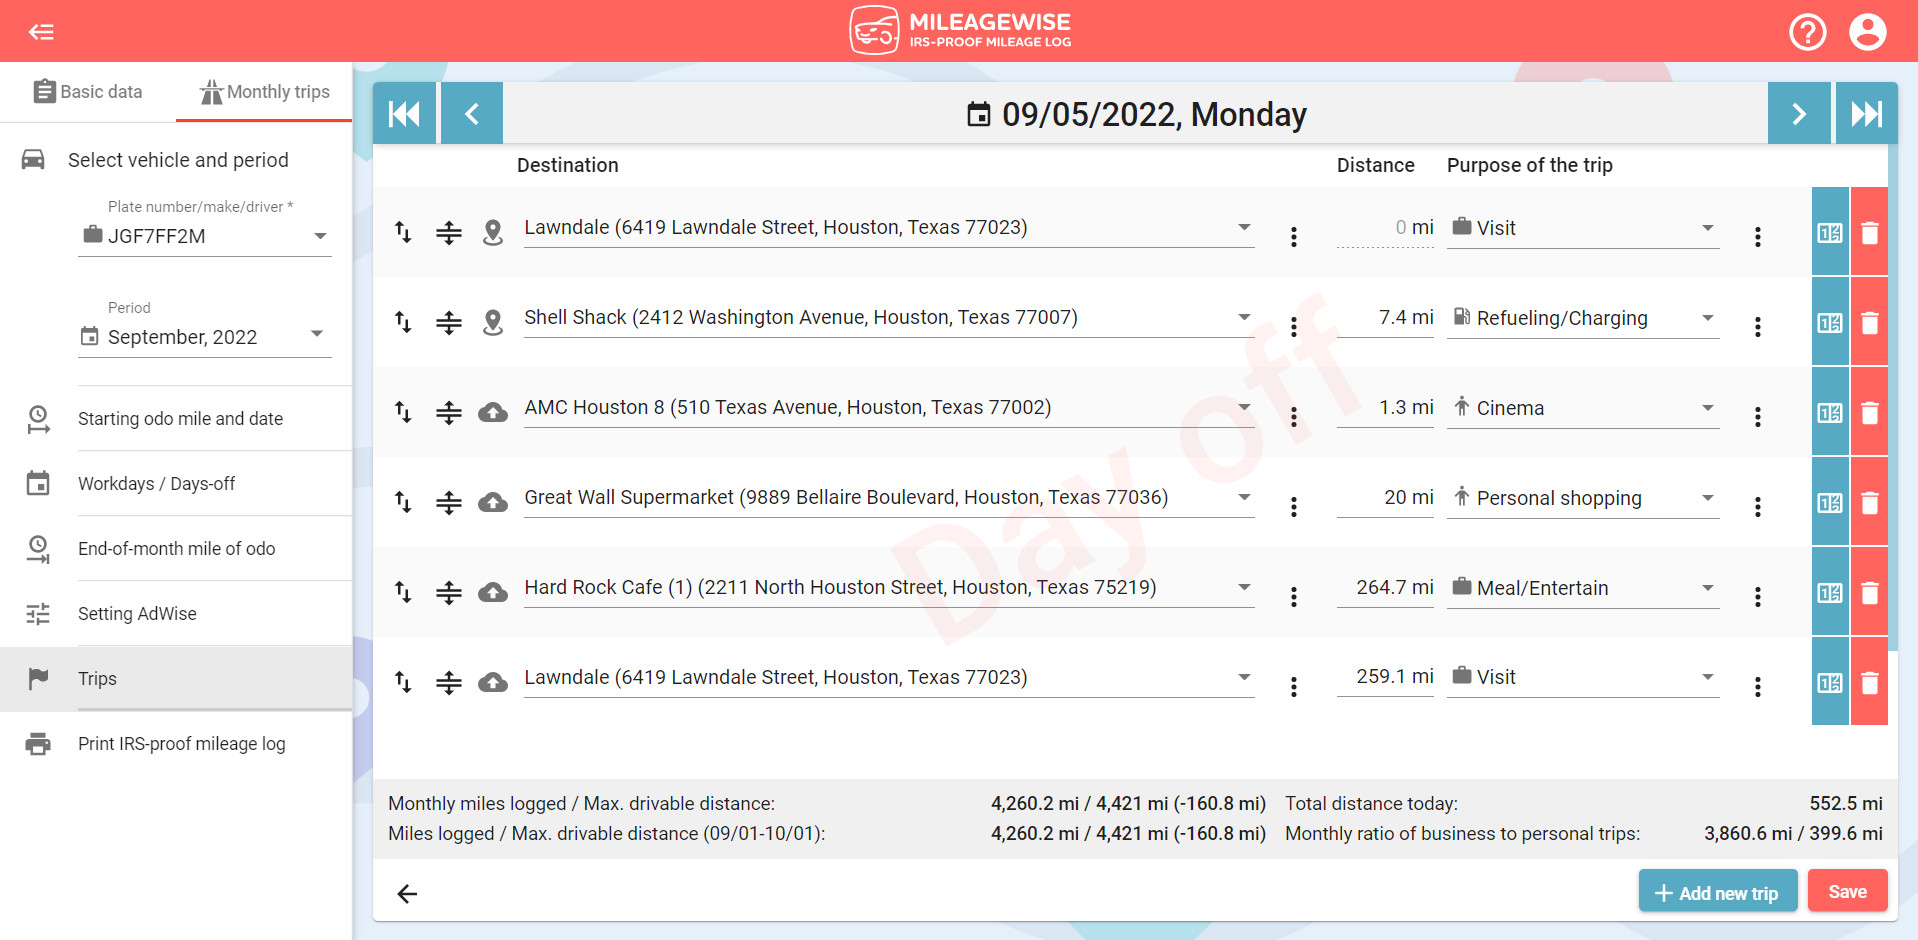
Similarly, we insert imported trips under previously recorded fixed trips.
If needed, you can edit the days for which you have imported your fixed trips. Open the day in Calendar or List View. Imported trips are marked with the ![]() icon. You can delete trips individually, change the purpose of the trips, change the order of the trips, and add new fixed trips.
icon. You can delete trips individually, change the purpose of the trips, change the order of the trips, and add new fixed trips.
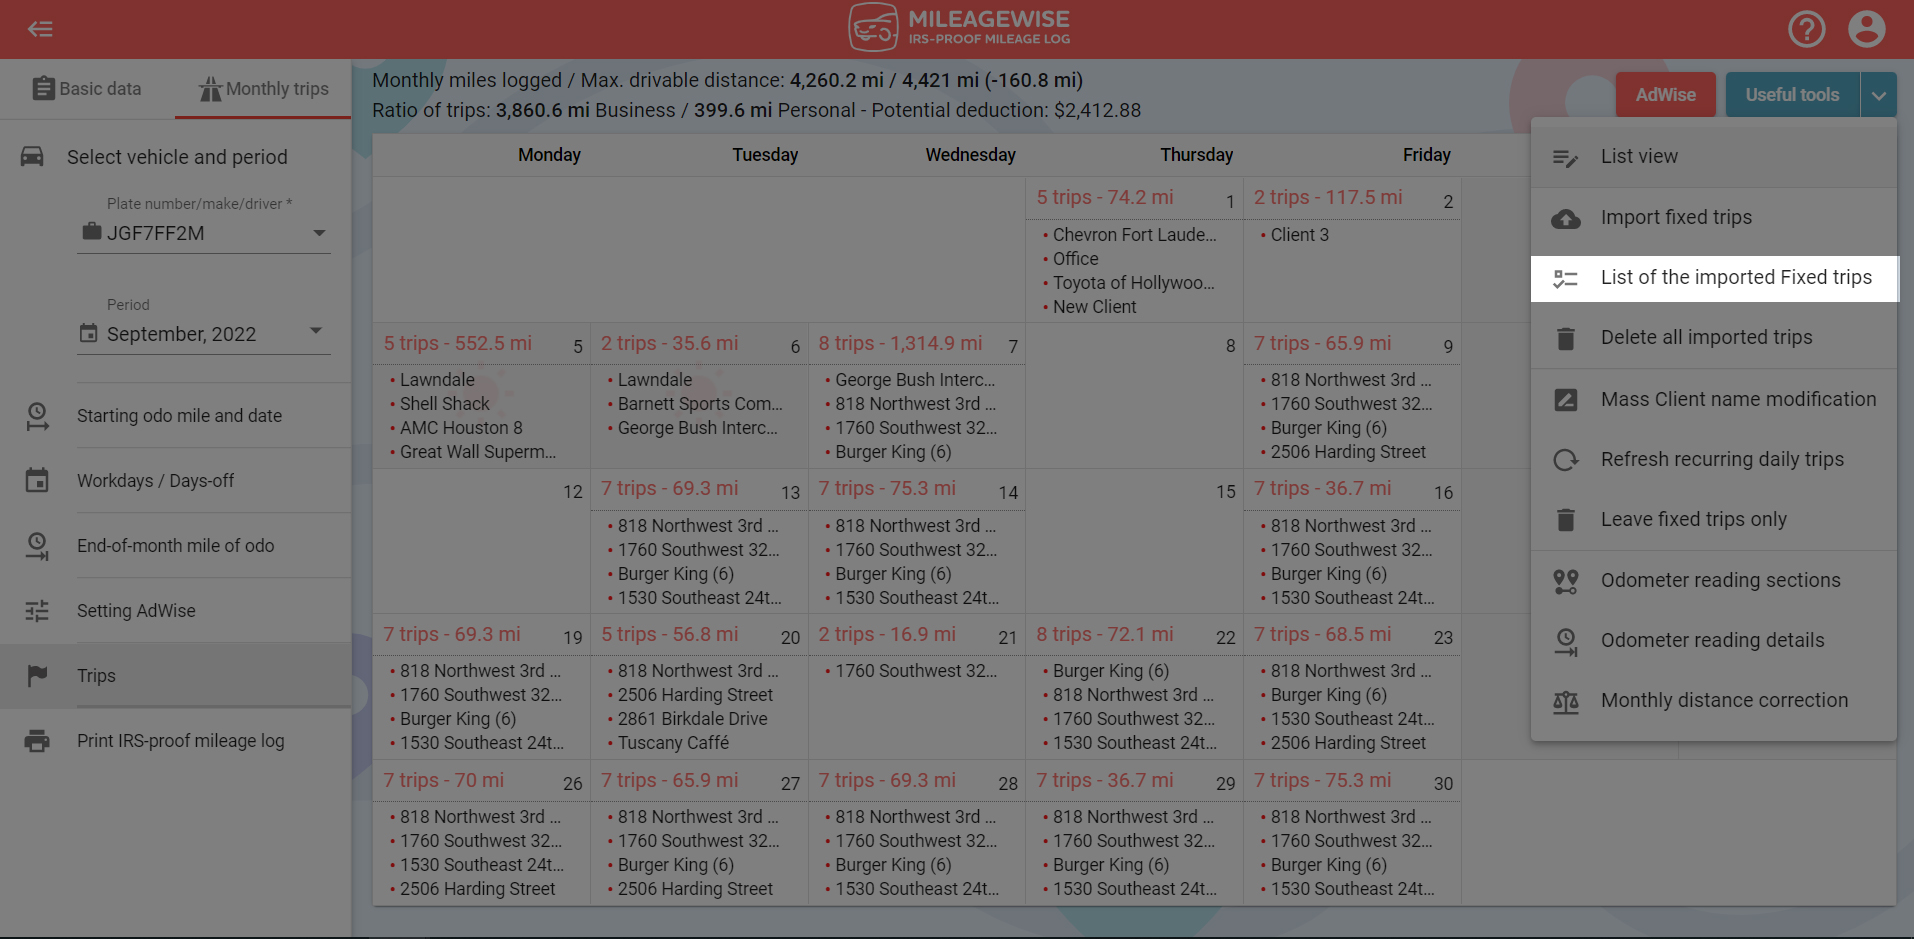
You can view the list of fixed trips created during the import. In the Useful tools menu in the upper right corner, select the List of the imported Fixed trips.
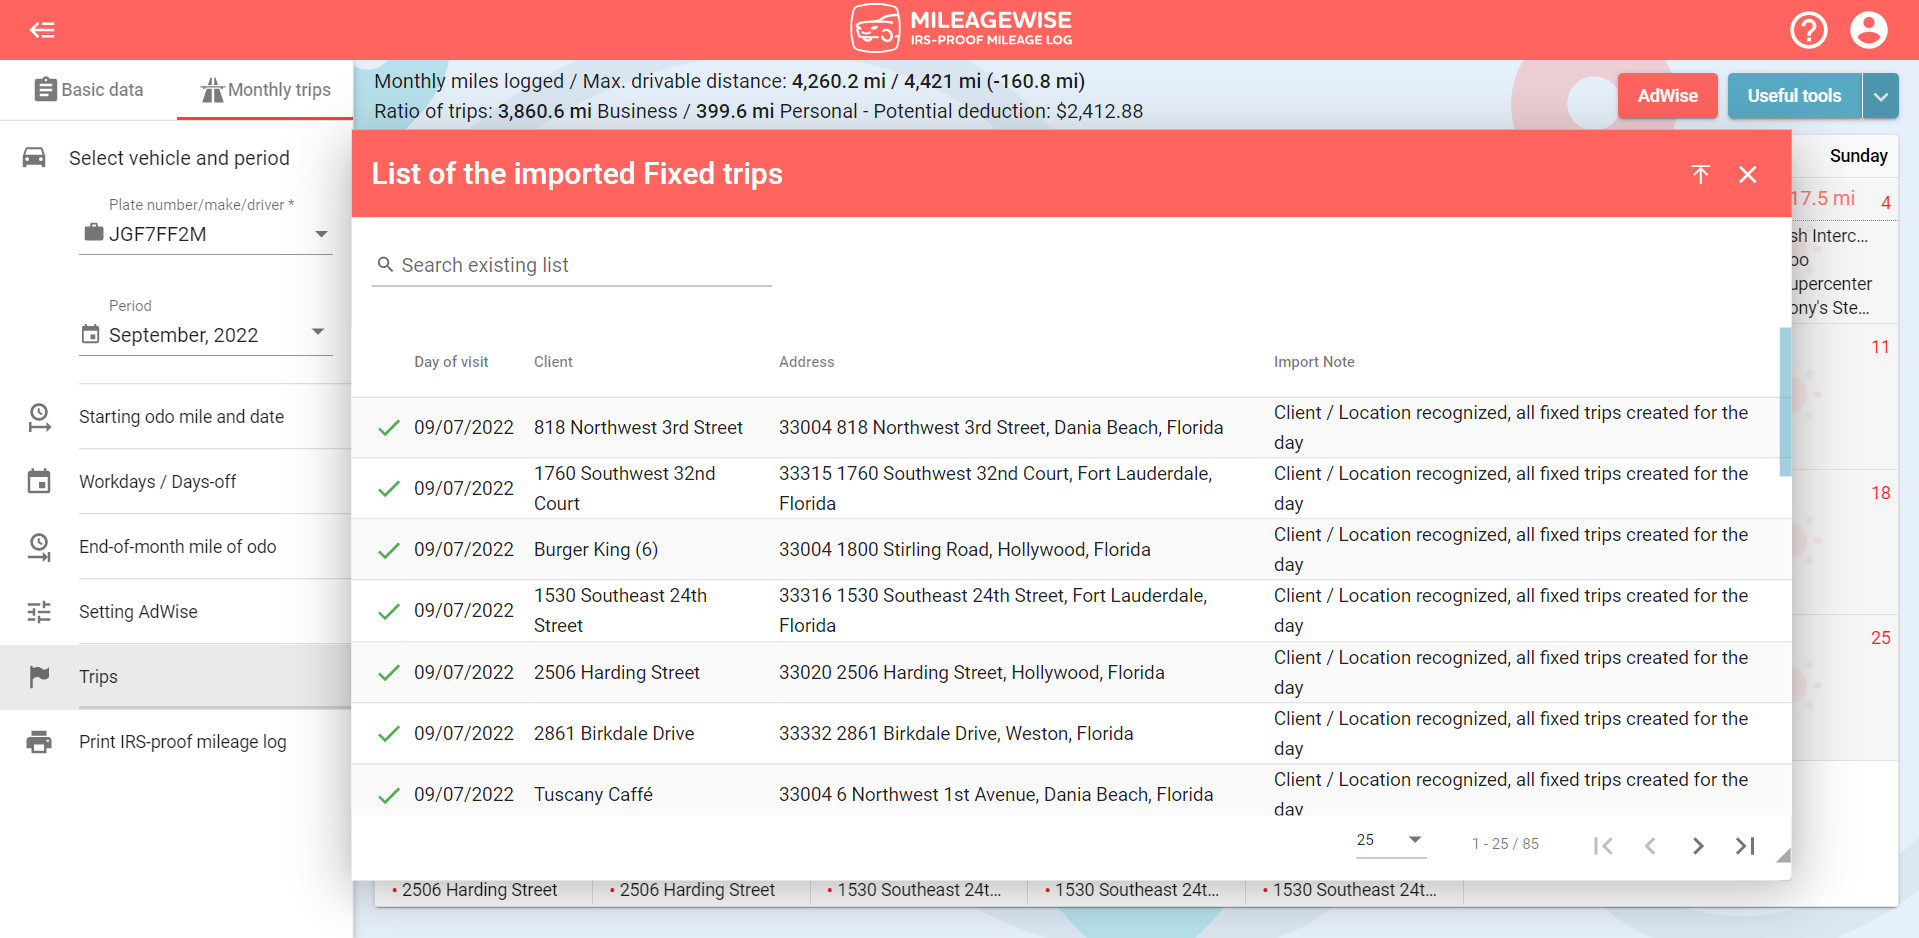
You can resize the window that opens, scroll through the uploaded fixed trips, and search for specific trips in the list.
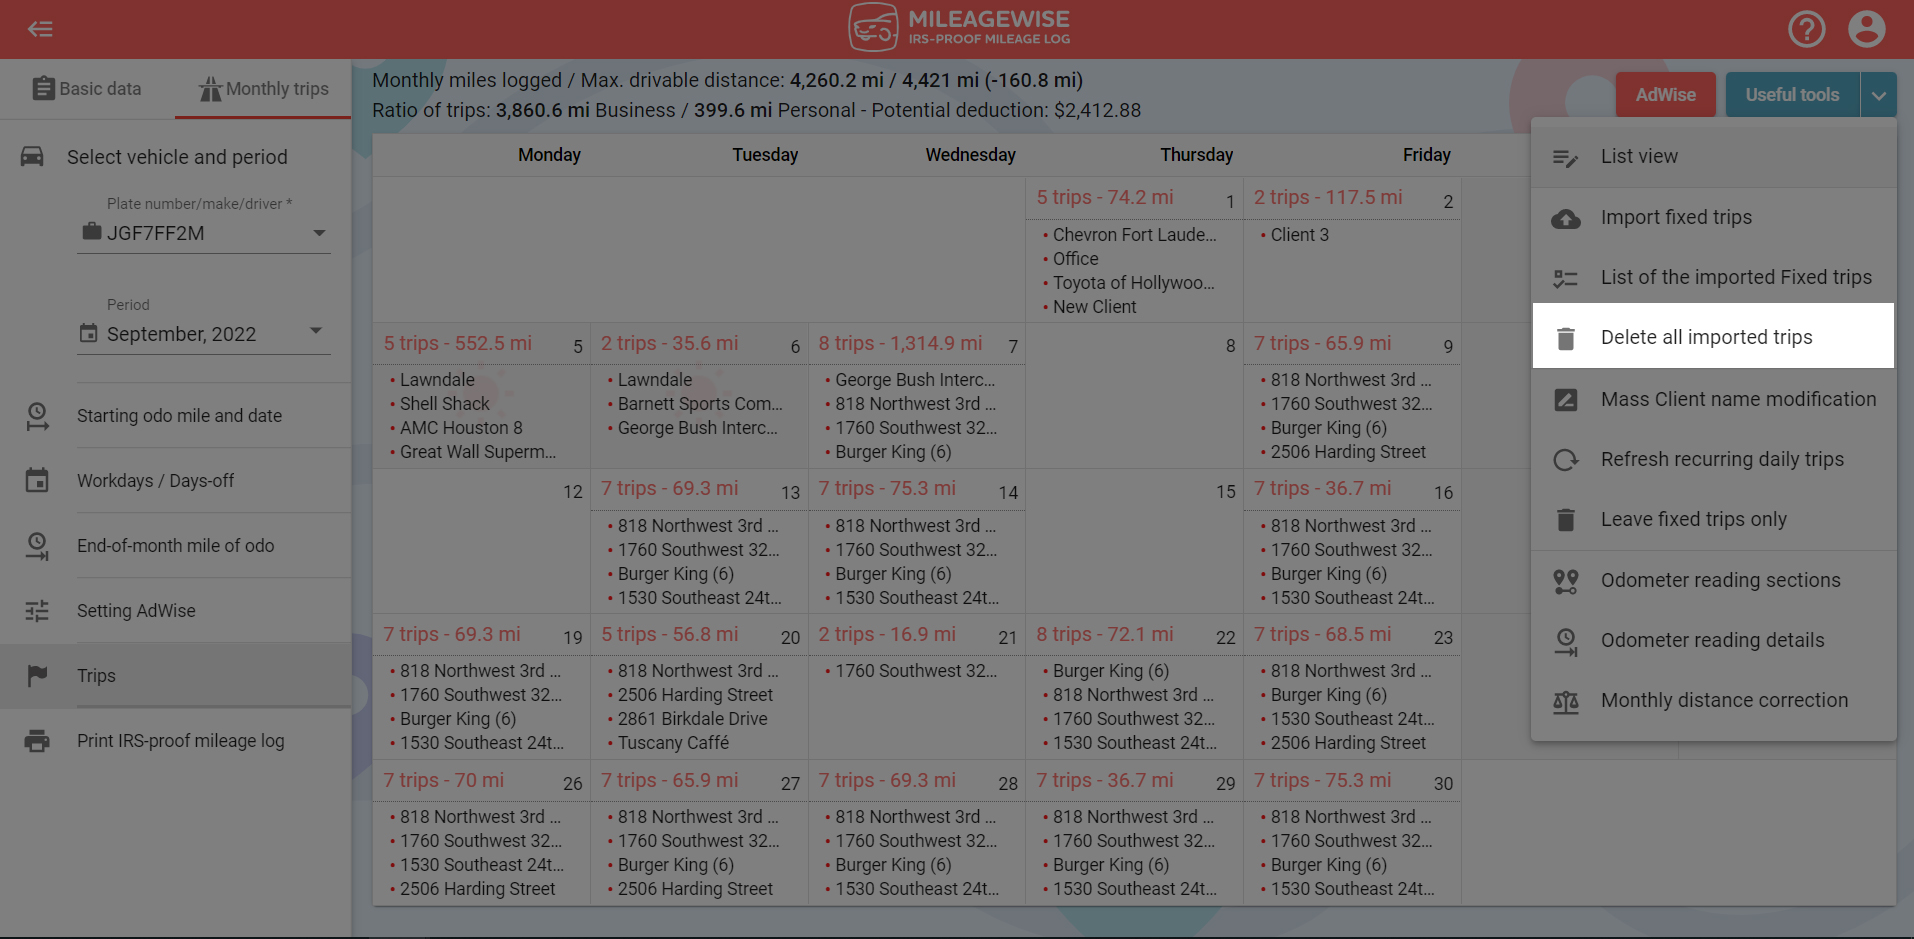
You also have the option to delete all imported fixed trips at once. In the Useful tools menu, select Delete all imported trips.
Is your Google Timeline History missing?
No worries! If you lost data, reconstruct your trips with MileageWise’s very own AI Wizard Mileage Log Generator!
With our AI-powered feature, you can recreate your past miles and fill in the gaps with ease while ensuring IRS compliance. Embrace the simplicity and accuracy of our solution and maximize your tax savings.
Effortless IRS Compliance with Google Maps Data and MileageWise
As you can see, exporting your Google Maps Saved Places and Google Timeline from Google Maps can have numerous benefits, including easy access to your favorite locations and activities on any device, sharing them with others, and the ability to use them with other mapping services and software.
By using Mileagewise, you can further enhance these benefits by using your saved places and timeline to track your mileage and expenses for business or personal tax purposes and creating an IRS-proof mileage log. With its user-friendly interface and powerful features, Mileagewise provides an efficient and effective way to manage your travel-related data.
So, whether you’re a business traveler, a frequent adventurer, or just someone who likes to keep track of their favorite spots, exporting your Google Maps Saved Places and Timeline to Mileagewise can save you time, money, and hassle.
Try MileageWise for free for 14 days. No credit card required!
Dashboard
FAQs
How do I save a trip on Google Maps?
To save a trip on Google Maps, use the ‘Save’ option after setting your route in the directions feature.
How do I remove saved places in Google Maps?
To remove saved places in Google Maps, go to ‘Saved’, select the place you want to remove, and choose ‘Remove’.
What does missing travel mean on google maps?
If you’re seeing this phrase, it might refer to a specific issue or error related to travel data that isn’t being displayed or tracked correctly in your Google Maps application. For a precise definition or troubleshooting, checking Google’s support or help forums may provide more context or a specific solution to this issue.
What is exporting Google Maps saved places and timeline data good for?
Exporting this data allows you to access and share your travel history across different devices, create personalized travel maps, and utilize your data for deeper analysis or tax reimbursement purposes.
How do I change the year and date in Google Maps?
In Google Maps, changing the date for viewing different data points is not directly possible; however, you can view historical data by selecting different dates in the timeline feature in Google Maps’ Street View.
How can I use Google timeline for tax reimbursement?
Exporting your Google timeline and importing in to MileageWise enables recreating mileage for business purposes, which can then be used to claim tax deductions or reimbursements.
What file formats can I use to export my Google Maps data?
You can choose between JSON, ideal for web integration and application development, and KML, perfect for detailed geographic visualizations in applications like Google Earth.
What should I do if I encounter issues exporting my data?
Ensure you are using a compatible browser, clear your browser cache, check your internet connection, and consider exporting data in smaller batches if problems persist.
How can I import my Google Timeline data into MileageWise?
After exporting your Google Maps Timeline data using Google Takeout, import it directly into MileageWise to calculate deductions effectively and create IRS-Proof mileage logs.
| MileageWise | Other Mileage Tracker Apps | Other GPS Based Trackers | Excel | Tax Professional | |
| Mobile App for Ongoing Tracking | |||||
| Web Dashboard to Manage Trips | |||||
| Imports Trips and Locations from Google Timeline | |||||
| Lifetime Deals Available | |||||
| Average Reported Business Mileage Deduction | $12,000 | $710-$8500 | $400-$5,700 | $200-$2,000 | |
| Average Time Creating Retrospective Mileage Log (Yearly) | 7 minutes | 180 minutes | 180 minutes | 180 minutes | N/A |
| AI Wizard Mileage Log Generator for Retroactive Mileage Recovery | |||||
| Produces IRS-Proof Mileage Logs | |||||
| Free Phone Support with Live Agent | |||||
| Mileage Log Preparation Service | |||||
| Data Accessible in the Cloud |


